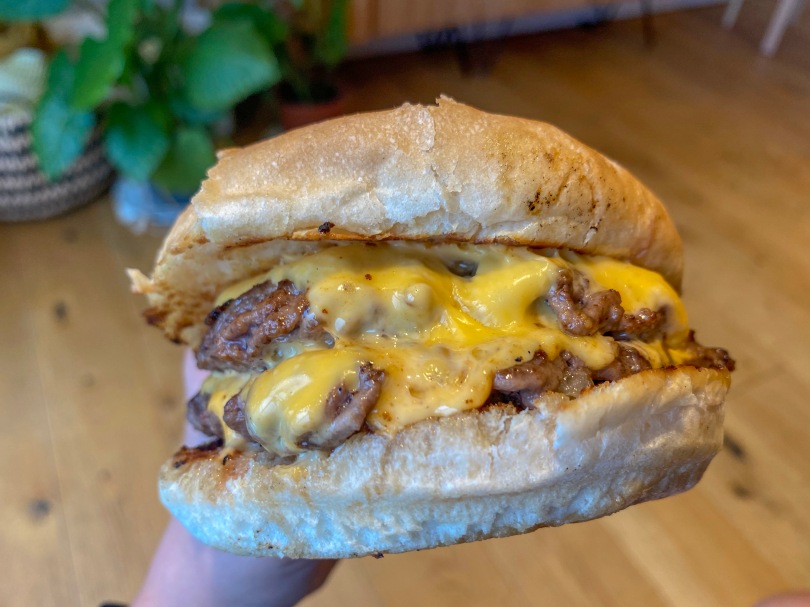
Onion Smash Burger - double onion cheeseburger

Onion Smash Burgers

I love burgers. 95% of the time I get a Deliveroo it’ll be Bleecker, Burger & Beyond, Salt Shed, Black Bear or Shake Shack. But, despite my deep love of burgers, I’ve never mastered making my own – until now. And let me tell you, making an incredible burger could not be more simple. It all comes down to the meat you use – the quality and the fat content. This burger itself is literally just salt & minced beef, so as you could imagine you really want a delicious, high quality mince to bring the flavour. The other thing you need is at least 20% fat – this will bring with it yet more flavour and juiciness. The rest of the toppings are up to you & how you like to eat your burgers. I like mine super simple – onions and American cheese. I don’t like to overpower that delicious patty.

These burgers were inspired by a recent trip to the George Motz x Bleecker burger pop-up. This was his 1 UK stop on his burger tour and my friend Ros & I were lucky enough to get one (after a 3 hour queue, and I would do it again). Motz did smash burgers with onions – you make these but putting a ball of meat on the grill, sprinkling on some raw, sliced, white onion, seasoning it and smashing it down using a spatula. Smash burgers are meant to be thin with slightly rugged and crispy edges – but they’re still juicy af in the middle. I never thought I’d be able to make a burger that came close to the ones I order but this recipe will get you pretty damn close! The burgers are crisp on the edges, but so juicy in the middle. The cheese melts & mixes in with the fat and the bread soaks up any drippage. And did I mention they literally take under 15 mins to coo? Yeah, you have to try these.


Onion Smash Burgers

Serves 2 | Cooks in 15 mins

Ingredients

320-360g high quality 20% fat mince meat

4 slices American cheese

2 burger buns

1/2 white onion, thinly sliced into half moons

Veg oil & butter for cooking

Salt for seasoning

Method

  1. Divide your meat into 80-90g portions and roll into a ball.
  2. Melt a knob of butter in a cast iron pan over medium high heat. Add the buns cut side down and toast until lightly golden. Set these aside
  3. Wipe out the pan to get rid of any bread crumbs, coat the bottom of the pan in veg oil and turn the heat to medium high.
  4. Once the pan is very hot, add a ball of mince meat. You’ll need to work very quickly – season very generously with salt, and top with a quarter of the sliced onion. Place a wide metal spatula on top of the ball, and press down using the end of another spatula. You want your meat to be <1cm thick – we want crispy edges!
  5. Cook on one side for 1-2 mins until the meat is caramelised and a little crispy. Flip the patty and add the cheese on top. Cook for another 1-2 mins until the cheese is melted, the bottom of the patty is caramelised and the onions have taken on some colour.
  6. Repeat this for the remaining 3 patties.
  7. Stack 2 patties per bun & serve with your choice of sauce/pickles. Let me know in the comments how you have your burgers!
Cheesy, Tomatoey Sausage Pasta Bake

Cheesy, Tomatoey, Italian Sausage Pasta Bake

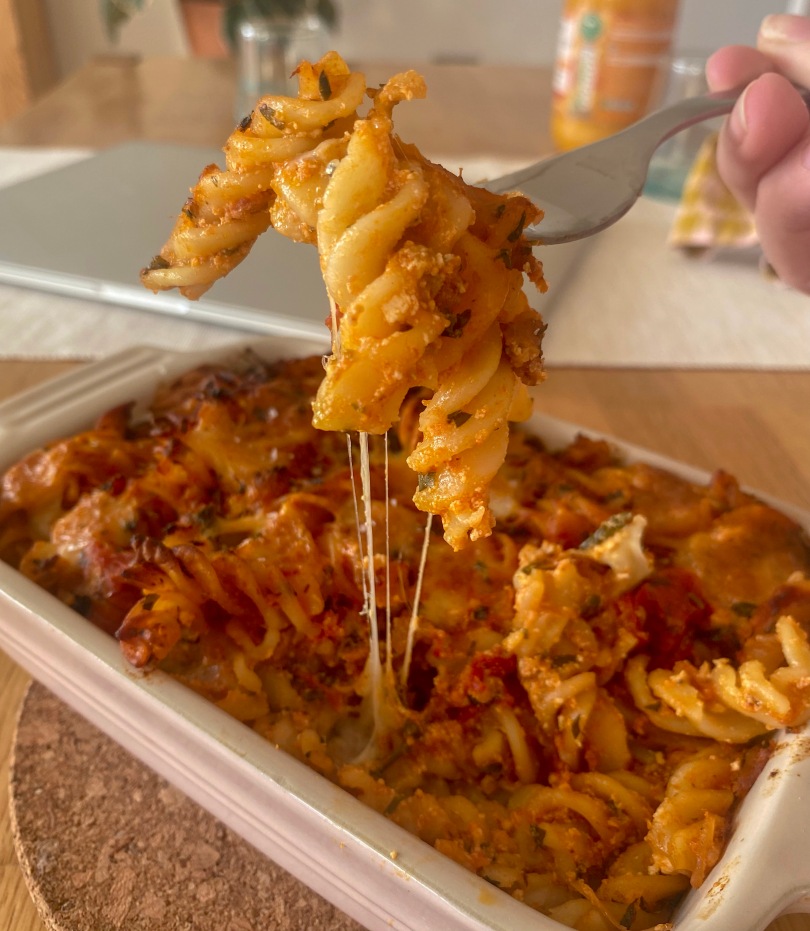
This is one of my go to comfort, hangover dishes. We’re talking cheesy carbs with a real punch of herby, tomatoey flavour. This dish was inspired by one of my fave Chrissy Tiegen recipes – her pasta alla norma. I really liked what she called ‘mozzarella bombs’ – her dish and this one have chunks of mozzarella studded throughout the pasta that get all melty and stretchy as the pasta bakes. When your fork hits a mozzarella clump its like the best treasure discovery you’ve ever experienced. I mean just look at the cheese pull in that pic. The portion sizes on this dish are quite large, because I’m basing it on what I’d eat on a very hungover Sunday (which turns out to be enough pasta for a 2 person standard serving). So be warned when you’re making this – I would say it serves 2 high appetite people, or 3-4 regular appetite.


Cheesy, Tomatoey, Sausage Pasta Bake

Serves 2-3 (2 very hungry) | 1 hour + 40 mins baking

Ingredients

1tbsp olive oil

1tsp butter

1 white onion, sliced crossways into thin half moons

1/2 my Italian Sausage Meat without the garlic

2-3 large cloves garlic minced

2tbsp tomato puree

1 400g tin whole plum tomatoes

Hanful parsley minced

Hanfdul basil minced

A few sprigs of rosemary minced

300g short pasta of choice, rigatoni or dusili

125g ricotta

150g ball of mozzarella cut into 1.5cm cubes

A grating of parm to taste

Method

  1. Heat the oil and buttere in a large saucepan or casserole over low heat. Once melted, add the onions with a pinch of salt and cook with the lid on, stirring often, until it partially caramelises (~15-20 mins).
  2. Once the onions are ready, push to one side of thee pan and splash a little oil in the other. Turn the heat to medium/high. Add the sausage meat – don’t stir for the first minute or 2. You want to form a nice caramelised crust. At this point start to break up the sausage into large chunks. Cook until caramelised all over and a nice fond has formed. Stir through with the onions.
  3. Add the garlic and good for a minute or two until fragrant.
  4. Add the tomato puree, stir and cook for another few minutes until slightly darkened in colour.
  5. Add the tomatoes and about half a tin of water, crush the tomatoes into smaller chunks with a spatula. Add the herbs. Bring to the boil and then immediately turn the heat to low.
  6. Simmer for 20-25 mins. Meanwhile, cook the pasta in heavily salted boiling water until al dente.
  7. Preheat the oven to 180°C/160°C fan
  8. Once the sauce is cooked, stir through the ricotta and add salt, pepper and parm and taste for seasoning. Add the pasta and 3/4 of the mozzarella chunks – stir to combine and transfer to your baking dish.
  9. Bake in the oven for 30-40 mins until bubbling and the mozzarella is nice and melty. Leave on the side for 5 mins and serve!
Chilli garlic tomato pappardelle with dressed mozzarella with parm

Garlic, Chilli Tomatoey Pappardelle With Dressed Mozzarella

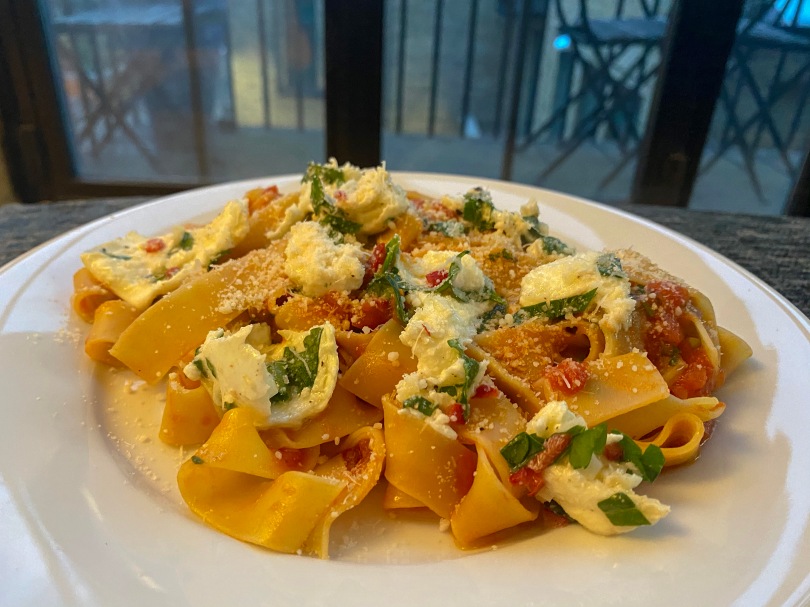
We’re back, and it’s another pasta recipe (surprise surprise). Can you tell pasta’s my favourite food? This one is a super tomatoey, garlicky and punchy dish. Think arich, garlic, chilli and tomato sauce over pappardelle with a super tasty and fresh seasoned mozzarella on top. This another quick one, perfect for a weekday dinner. The creamy mozzarella really balances out that rich tomato and mild heat from the chilli. If you can get it, I’d recommend going for a high quality buffalo mozzarella for this dish. The mozzarella is served raw so we’re really after high quality ingredients as there’s no hiding. I’m gonna give you fair warning, this is a very garlicky dish (cooked in the sauce and raw with the mozzarella) so I don’t recommend eating this right before a social gathering, unless you’re all eating it.


Garlic, Chilli Tomatoey Pappardelle With Dressed Mozzarella

Sevres 2 | 30-40 mins cook + Prep

Ingredients

1 ball good quality buffalo mozzarella

4 cloves garlic, 1 clove minced and the rest thinly sliced

2 red chillis, deseeded and thinly sliced

Large handful basil minced

Large handful parsley minced

1tsp red wine vinegar

A few good glugs of good quality extra virgin olive oil

1 tin plum tomatoes

180g dried pappardelle

2-3tbsp grated parm + more to serve

Method

  1. Tear the mozzarella into bitesize chunks and place in a bowl. Add the minced garlic, 1/4 of the chilli, a small handful of parsley & basil, red wine vinegar and a good few glugs of olive oil. Season with salt and pepper, stir, cover and chill in the fridge until ready to eat. This can be done a few hours ahead
  2. Heat 2-3 tbsp olive oil in a medium sauce pan over medium/high heat. Add the sliced garlic and the rest of the chilli. Cook, stirring frequently, until the garlic just begins to turn golden and is fragrant (should take around 5 mins, depending on your hob).
  3. Add the tomatoes, and about 1/2 tin of water. Squish the tomatoes with a spoon. Bring this to a boil then lower the temperature and simmer for 20-30 mins until the sauce has thickened.
  4. Add in the rest of the parsley & basil, and the grated parm. Season to taste with salt & pepper.
  5. Cook the pappardelle in heavily salted pasta water until al dente. Reserve a mug of pasta water towards the end of the cooking time. Combine the pasta & sauce, and add some pasta water to reach your desired sauce consistency.
  6. Serve the pasta with the torn mozzarella on top & more parm if you like!
Pistachio Pesto Pasta With Burrata

Pistachio Pesto Pasta With Burrata

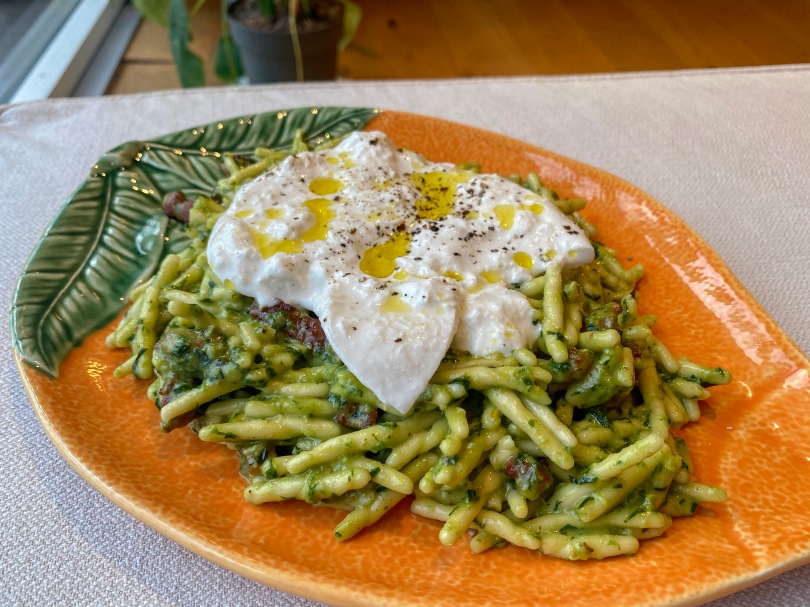
This is another one of my super quick & easy pasta dishes, but this one has a little extra wow (and by wow I mean a whole burrata on top). Which makes this the perfect dish for trying to impress friends with very little prep time. It consists pasta, a super flavourful and simple pistachio pesto and a whole burrata on top. What’s not to love? My favourite pasta to use here is trofie. This is an eggless semolina based pasta, which means the texture is a little chewier and has more bite than a standard egg pasta. This pasta type + pasta water and pesto make for a really luxurious feeling sauce. I’ve added pancetta to mine for a little extra salty crunch, but this is totally optional. It’s just as delicious without!


Pistachio Pesto Pasta With Burrata

Serves 2 | 20mins cook + prep

Ingredients

30g basil

1/2tbsp pine nuts

2tbsp pistachios

1 clove garlic

30g grated parmesan

4tbsp extra virgin olive oil + more to serve.

180g pasta (I prefer to use trofie for this)

1 burrata

Optional: 90g pancetta

Method

  1. Toast the nuts in a dry frying pan over medium high heat until lightly toasted – watch this like a hawk as it can burn really quickly. Set aside to cool
  2. Bring a large pot of heavily salted water to the boil, add the pasta and cook until al dente. Reserve a mug of pasta water near the end of the cooking time.
  3. If using, add the pancetta to a cold pan and put this over medium high heat. Cook until crisp and the fat has rendered.
  4. Meanwhile, make your pesto. Pestle & Mortar method (my preferred method, see notes): add the cooled nuts, garlic and a pinch of salt to a mortar and grind using the pestle in circular motions, pushing the mix against the edge of the bowl, until it forms a paste. Next add the basil (you may need to do this in stages to get it to fit) and grind until a paste forms. Add the grated parmesan, grind to combine. Transfer this mix to another bowl and add the olive oil while stirring. Season with salt and pepper to taste.
  5. Alternatively, if you prefer to use a food processor, add all ingredients to a food processor and blend until a paste forms. Season to taste
  6. Once cooked, combine the pasta with the pesto, pancetta (if using) and a splash of cooking water – add more if needed reach your desired consistency. Season with salt and pepper as needed.
  7. Transfer to a serving dish, place the burrata on top and cut it open, allowing the creamy middle to run over the pasta. Add more salt & pepper on top, and finish with a drizzle of extra virgin olive oil.

Note: I generally prefer the pestle & mortar method as a food processor can bruise the basil and leave you with a bitter tasting pesto. The pestle and mortar method makes for a much creamier pesto

Creamy Sausage Ragu

Creamy White Sausage Ragu

For me there is no better way to spend a Sunday than making a ragu. There is something so relaxing and therapeutic about focussing your whole mind on cooking for a few hours. Every step requires so much care and attention from chopping all the veggies perfectly to simmering it all down. All that time and effort is immediately made worth it when you taste the first bite and you realise you’ve made something really special. Making a ragu such a rewarding experience in so many ways – the process of cooking it and the amazing meal you get at the end. Anyway, enough of my love letter to ragus – lets talk about this sauce.

This sauce is the culmination of all my ragu-related learnings over the years from the Italian cooking heroes Anna Del Conte & Marcella Hazan. I always like to have a ragu in my freezer as it makes for such an easy but still tasty and high quality dinner. So I usually have a few boxes of ADC or Marcella bolognese, and now I’m adding this white ragu as a freezer staple (high praise as I only have a half freezer & 1 of the drawers is unusable from constantly freezing shut). It’s a much richer and creamy version of its tomatoey conterpart, and there is space for both in my heart. The sauce is SO flavourful from the love and time that goes into cooking it – I really can’t recommend it enough!


Creamy White Sausage Ragu

Serves 4-8 (depending on how saucy you like pasta – see notes) | 2.5-3.5 hours prep + simmer time

Ingredients

2 cloves garlic

25g butter

1tbsp olive oil

1 white onion

1 bulb fennel

454g sausage meat (or sausages removed from their casing)

3 tsp fennel seeds toasted & crushed (or fennel pollen)

2 tsp dried thyme

2 tsp dried oregano

150ml milk

150ml dry white wine

200ml chicken stock

150ml cream

Large handful of parsley, finely chopped

25g grated parmesan

Method

  1. Prep the veggies: peel and crush the garlic with the side of a knife; finely dice the onion; quarter the fennel, remove the core and finely slice.
  2. In a casserole dish/dutch oven, heat the butter and oil over medium/low heat. Add the garlic and cook until golden. Remove the garlic and set aside.
  3. Add the onions and cook until starting to soften and turn translucent. Add the fennel and cook until slightly softened – 10-15 mins.
  4. While the veggies are cooking, combine the sausage meat with the fennel, thyme, oregano and salt & pepper.
  5. Once the veggies are cooked, turn the heat up to high and pushed the vegetables to the side of the pan and add the sausage meat – this ensures the meat browns rather than stews. Leave the to cook undisturbed for a minute or two until brown, flip the meat and repeat on the other side. Leaving the meat like this allows it to brown & form chunks, this adds so much flavour and means it won’t completely break down in cooking.
  6. Use a spatula to break the sausage meat in large chunks and stir through the vegetables. Cook, stirring occasionally until the meat is cooked through with lots of brown/caramelised pieces. A good fond will start to form (this is the brown stuff sticking to the bottom of the pan) – don’t be afraid! This will be a source of a lot of flavour.
  7. Once the sausage is ready, add the milk, bring to the boil and then reduce the heat to low. Simmer until the milk has almost completely disappeared, through this step scrape the bottom of the pan to release the tasty tasty fond. Marcella says to add the milk before the wine as it protects the meat from the acid of the wine, and I trust that woman with my life. Add the wine and again reduce until all the liquid is almost gone.
  8. Add the stock, turn the heat as low as it’ll go and place the lid on the pan slightly askew. Leave this to simmer for 30-45 mins. Add the cream and simmer for a further 45-60 mins.
  9. Once cooked, take off the heat stir through the parsley and parmesan. Serve with your favourite pasta and more parm and parsley on top.

Notes: you’ll notice the service size is quite a big range. This is because the way Italians & English have their pasta is very different. The english way is to add a lot of sauce, but the Italian way is to be much more sparing with sauce. I lean towards the Italian way, especially with this sauce – it’s so flavourful so a little goes a long way. When I have this dish I usually combine the sauce with a little pasta water to thin it out slightly to cover all the pasta.

Herby Miso Garlicky Ramen Noodles

Ramen Noodles With Herby Miso Sauce

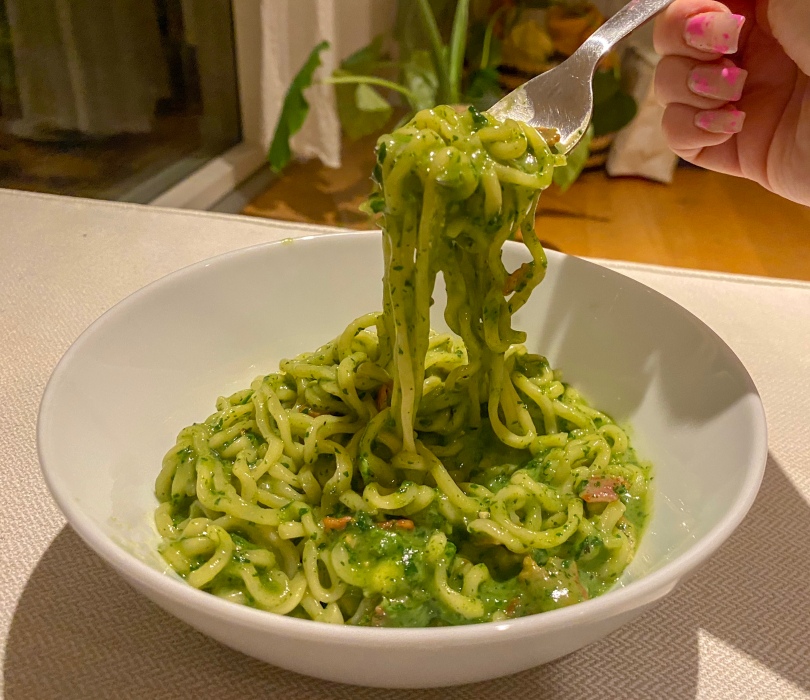
This is my second spruced-up packet ramen recipe – the first being my miso peanut butter ramen, and both recipes are up there with the best recipes I’ve come up with (IMO anyway). This dish is super simple and cooks in less than 10 minutes but really doesn’t skimp on flavour. It’s such a fresh tasting dish from the herbs and lemon, with a salty, earthy kick from the miso and soy. Using the egg, similar to a carbonara, makes this sauce super creamy but doesn’t make it too heavy. Feel free to include or exclude the bacon to make it veggie, or swap in whatever meat/protein you have lying around. Ramen is one of my favourite things to have as an easy, quick weeknight dinner – and this is a way to really elevate a simple packet of ramen.


Herby Miso Ramen Noodles

Serves 1 | Cook + Prep 10 mins

Ingredients

1 packet your favourite ramen, noodles only (I prefer Chapagetti as the noodles are thicker)

Handful parsley (stalks & leaves)

Handful coriander (stalks & leaves)

1tbsp white miso

Juice 1/4 lemon

1 clove garlic

1tsp soy sauce (+ more to taste)

1 egg

2 rashers streaky bacon (optional)

Chilli oil to serve (optional)

Method

  1. If using, dice the bacon and fry in a frying pan over medium high heat with a splash of oil until crispy. You could sub in other proteins at this point instead of the bacon.
  2. Bring a pan of water to the boil for the noodles
  3. Meanwhile, add the parsley, coriander, miso, lemon, garlic and soy sauce to a blender or food processor. Add the egg to a bowl and beat with a fork
  4. Once the water is boiling, add the noodles & cook to your liking. After 1-2 mins of cooking, add a few tablespoons of noodle water to the blender/food processor and blend until smooth. You want to use the minimum amount of water here – so start with 2-3 tbsp of water and then add more 1tbsp at a time until the mix is able to blend until completely smooth. Combine the blended herb mix with beaten egg with a fork.
  5. Once the noodles are cooked, transfer them to the frying pan with the bacon (or, if not using the bacon, to a new frying pan) over very low heat. Add the herby egg mix and cook over low heat stirring freqently until the sauce thickens enough to coat the noodles and the egg is cooked (think carbonara). The cooking time very much depends on your hob and pan.
  6. Add more soy sauce and salt and pepper to taste.
  7. Serve in a bowl with chilli oil over the top if you like a bit of a kick!

Cheesy Pork Quesadillas With Avocado Crema

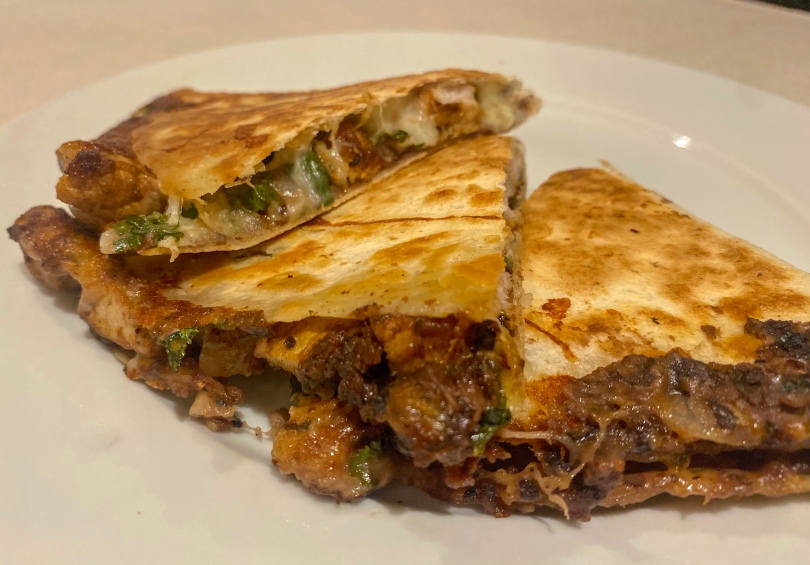
This dish is one of my favourite comfort foods I make. I use a limey, garlicky, coriander-y marinated pork steak, my creamy refried black beans, two types of cheese and fry it up in a tortilla for a delicious meaty cheesy meal – all dipped in a lovely fresh avocado crema. I am the worst (or the best) for overfilling my quesadillas, but I’m not mad becuase it means I end up with this lovely cheesy crust around the outside. If anything, it makes it better. This is a super flavourful, rich but still fresh tasting meal.


Cheesy Pork Quesadillas With Avocado Crema

Serves 2 | 1 hour cooking + prep (+6-24 hours marinating)

Ingredients

Pork:

2 pork loin steaks, chops or shoulder steaks (~240-300g)

Large handful coriander

2 large cloves garlic

Juice & zest of 2 limes

2tbsp white winer vinegar

Salt & Pepper

Beans:

1 400g tin black beans + their juice

2 large cloves garlic minced

Chicken stock pot/cube

2-3tbsp double cream

Avocado Crema:

1 avocado

Juice 1 lime

1 large clove garlic

100ml sour cream or creme fraiche

Quesadillas:

2 large flour tortillas

1/2 white onion diced

60g grated cheddar*

60g low moisture mozzarella grated (see notes)*

*Cheese amounts are not set in stone – please use as much as you’d like

Method

  1. Prepare the pork – you want the pork to be no thicker than 1.5cm. If it is thicker, lay down cling film, lay the pork on top and then another layer of cling film and flatten the pork using a the flat side of a tenderiser or rolling pin to real 1.5cm or less.
  2. Make the marinade for the pork by adding all the ingredients, bar the pork, to a blender and blending until no large lumps are left. Combine the pork and marinate in a bowl or bag and refrigerate for 6-24 hours. Remove the pork from the fridge about an hour before cooking to reach room temperature for more even cooking.
  3. Next up, the refried beans. Heat a splash of olive oil in a small sauce pan over medium heat. Add the garlic and fry until golden.
  4. Add the beans, their liquid, the chicken stock and ~half a tin of water to the pan. Bring to the boil and reduce for 15-20 mins until about 1/3 of the liquid remains. You could reduce for more or less time depending on how thick you like your beans – I like mine a little thinner.
  5. Smash the beans using a potato masher until your desired texture. This is optional, but I like to stir through a little double cream to get a more luxurious texture. If using, add the cream bit by bit, tasting after each addition until it reaches your desired texture and taste. Season to taste with salt and pepper and set aside
  6. Make the avocado crema – add all ingredients to a food processor or blender and blend until smooth. Cover with cling film, you want the cling film to touch the surface to avoid any browning. Set aside in the fridge until ready to use
  7. Now to cook the pork. Coat the bottom of a cast iron (ideally, but other frying pans will work) and heat over medium high heat. Once hot, add the pork steaks. Cook for 2-3 mins each side until cooked through. Be sure to check there is no pinkness left in the middle – cooking time will depend on your hob, pan and steak thickness.
  8. Rest the pork for 5-10 mins under foil, then cut the steak into 1cm cubes.
  9. Now it’s time to assemble the quesadillas. Put a large, dry pan over medium low heat and add the first tortilla. Fill one half of the tortilla as follows: a layer of beans, cheddar, chopped onion, pork, mozzarella. Fold over the tortilla and press down.
  10. Cook until golden brown, flip and cook the other side. A good hint for flipping is to place a plate on top of the frying pan, flip the quesadilla onto the plate then slide it back into the pan.
  11. Repeat to make the second the second quesadilla.
  12. Chop into thirds and serve with the avocado crema for dipping.

Note: In the UK we can’t get blocks of low moisture mozz so we have to use the grated stuff. In this case you’ll need to wash the mozzarella to get rid of the starch (this is used to stop the cheese sticking to itself, but it’ll also stop you getting a nice melt). Put the cheese into a sieve and rinse under cold water until the water runs clear. Spread the cheese in a thin layer onto paper towels and leave to dry.

Pasta Puttanesca

Puttanesca (-esque) Sauce

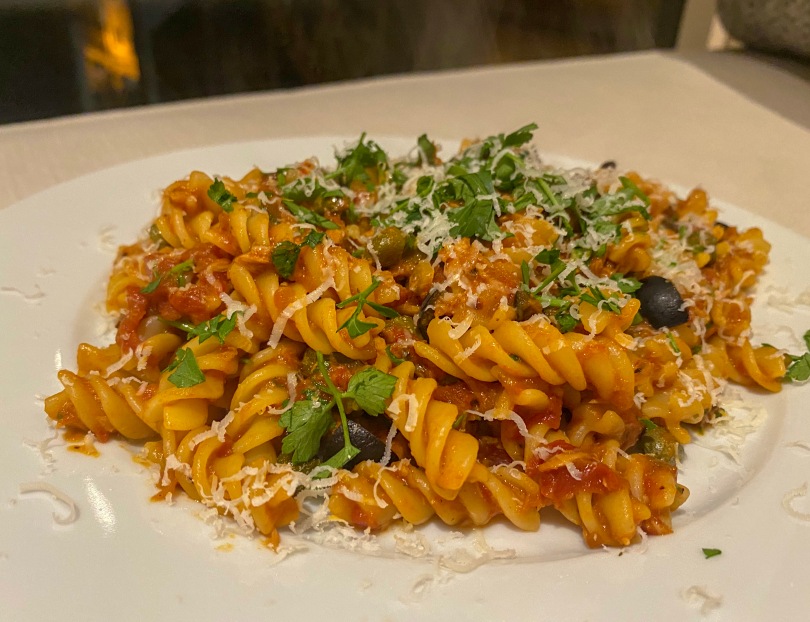
I learnt about this sauce from the Series of Unfortunate Events movie (IYKYK) and I’ve never looked back. Its a super salty, umami, rich tomatoey sauce – it really packs a punch without feeling too heavy. This is such a great go to weeknight dinner, sped up even more by using a frozen batch of my marinara. I always have a stock of this in my freezer as it can be adapted for so many dishes, and having the sauce ready knocks a good 20 mins off cooking times. This is another of my 15 minute pasta dishes where the sauce is prepped & cooked in the time it takes the pasta to cook. I’ve called this puttaensca-esque as I’ve included tuna which the original doesn’t – I love the addition of tuna for some extra fishiness and protein which keeps me fuller longer.


Putanesca (-esque) Sauce

Serves 1 | 15 mins prep + cook

Ingredients

100g fusilli or other short pasta (or 75g if you aren’t very hungry like me 95% of the time)

1 large clove garlic, thinly sliced

3 jarred/tinned anchovy fillets

1/2 tin tuna (drained)

1/4 batch of my marinara sauce

35g black olives roughly chopped

1tbsp capers

Sprinkle of chilli flakes, to taste

Handful parsley finely chopped

Squeeze of lemon to taste

Parmesan to serve

Method

  1. Cook the pasta in a heavily salted pan of water until al dente.
  2. Meanwhile, heat a splash of olive oil in a frying pan over medium high heat. Add the anchovies and fry, stirring often, until they dissolve into the oil.
  3. Add the garlic and frying until golden. Keep a close eye on this as this will burn quickly. Add the tuna and stir until combined
  4. Reduce the heat to low and add the marinara, capers, olives and chilli flakes (if using). Stir until warmed through. If the sauce is too thick at this point, add some pasta water to reach the desired consistency.
  5. Take off the heat, add salt, pepper and lemon juice to taste. Stir through the parsley (reserve some to serve) and set aside.
  6. Once the pasta is cooked, combine with the sauce and serve with the remaining parsley sprinkled on top and some grated parmesan.
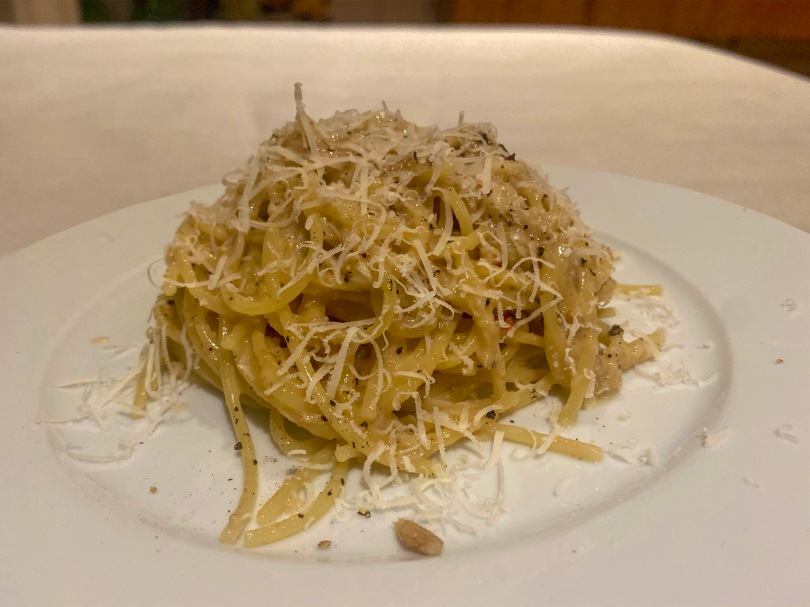
Crabonara (crab carbonara)

Crabonara (Crab Carbonara)

This dish was born out of my mum mishearing carbonara as crabonara – at the time neither of us had any idea that she had just inspired one of my best recipes yet (in my opinion anyway). It really is what it says on the tin – a carbonara but with crab instead of bacon. It’s a super quick dinner, perfect for a week night, that doesn’t skimp on quality or flavour. It really is a 15 minute meal – everything can be prepped while the pasta cooks. It’s creamy and rich like a carbonara, but with the delicate saltiness of crab instead of the salty punch from pancetta. 2 different but equally delicious meals. This version is a lot less rich than my Perfect Carbonara as it uses only the 1 egg per person, making it a bit more suitable for an everyday meal.


Crabonara

Serves 2 | 15 mins

Ingredients

200g long pasta (spaghetti or linguine work well)

100g mixed crab meat

1 large clove garlic

2 eggs

50g parmesan, grated + more for service

Freshly ground black pepper

Splash of olive oil

Method

  1. Cook the pasta in heavily salted boiling water 2 mins shorter than the packet says
  2. In the meantime, heat up a splash of olive oil in a frying pan over medium heat. Add the garlic and fry until lightly golden. Add the crab and cook, stirring often, until warmed through. Set the pan aside
  3. Beat the eggs with the parmesan in a bowl and add freshly cracked black pepper. Near the end of the pasta cooking time, add 2-3 tablespoons of pasta water to this mix while stirring (this will temper the eggs).
  4. Once the pasta is cooked, transfer it to the frying pan with the crab in. Turn a hob to low heat but keep the pan away from the heat for the moment.
  5. Add the egg mix into the pasta pan, be sure to keep moving the pasta continuously to avoid scrambling the eggs.
  6. Move the pan on and off the heat, stirring continuously until the egg is cooked and a silky sauce has formed (a few mins, depends on your hob). If you think the pasta is too dry add a tablespoon or two of pasta water until it’s your desired consistency.
  7. Serve with more freshly cracked black pepper and grated parmesan.
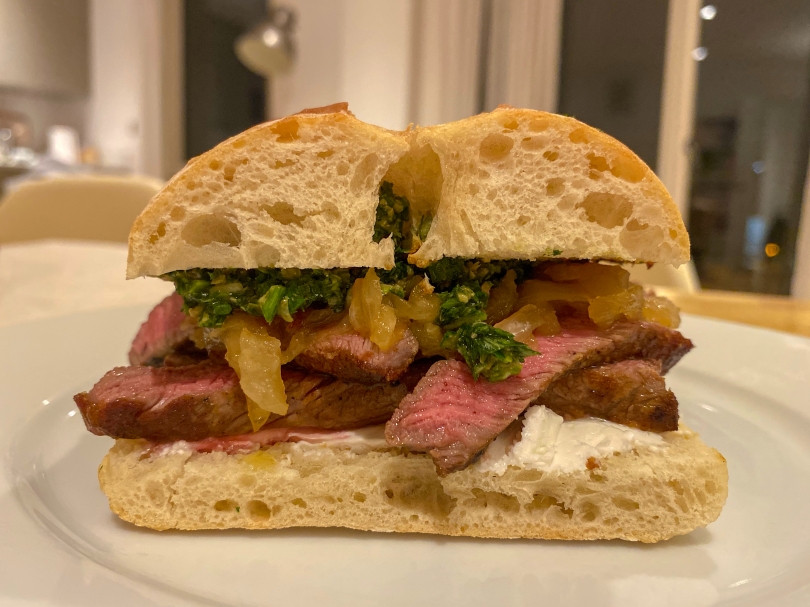
Steak sandwich with onion, goats cheese and salsa verde

Steak Sandwiches With Goats Cheese, Onions & Salsa Verde

I absolutely love steak sandwiches because I think it opens up the space to be really inventive with a steak. Steak and good bread is such a good base for almost any flavourings, but my personal favourite is this combo with salsa verde, caramelised onions and goats cheese. The onions and steak are both buttery rich, and the salsa verde cuts through that perfectly. For me, goats cheese is the perfect pairing as it adds the soft, creamy texture the sandwich needs but with an added tang. I know goats cheese can be a bit controversial, but I absolutely love it and stand by its use in this sandwich (that being said if you want to sub it for another soft cheese or good mayo I won’t be offended, as long as you let me know how it goes). I’ve also added my top tips for cooking a good steak at the end – not to toot my own horn but I really think I’ve mastered the perfect steak. I get mine caramelised on the outside with loads of butter and garlic, but still pink on the inside. All in all this sandwich really feels like a proper treat dinner – each component is delicious, well made and perfectly balanced.


Steak Sandwiches With Goats Cheese, Onions & Salsa Verde

Serves 2 | 45 mins prep + cooking

Ingredients

2 steaks of your choice or ~500g (I usually go for ribeye – good marbling)

2 white onions

1tbsp olive oil

3tbsp butter

1 batch of my salsa verde

2 large cloves garlic, peeled and squished

60g goats cheese

Ciabatta loaf (or bread of your choice)

Vegetable oil, to cook the steak

Method

  1. A couple of hours before you want to start cooking, remove your steak from the fridge, pat dry with kitchen towel and leave it out to dry and get to room temperature. This will allow you to get a good caramelisation on the steak when you cook it.
  2. Cut off the top & bottom of the onions, peel & chop in half. Finely slice the onions into half moons from side to side, not from top to bottom as this will caramelise better.
  3. Add the olive oil & 1tbsp of the butter to a saucepan and melt over a medium to low heat. When the butter has melted, add in the onions and a big pinch of salt. Stir to coat and put on a lid. Leave this to cook, stirring regularly, for~30mins until soft, jammy and caramelised.
  4. Once the onions are nearly cooked, it’s time to start the steak. Cover the bottom of a cast iron (or other) frying pan with a layer of vegetable oil and heat on high heat until smoking hot. Pat the steak dry one more time, then rub all over with olive oil. Right before you’re ready to add the steak to the pan season both sides generously with salt and pepper.
  5. Add the steaks to the pan, and allow to cook undisturbed for 1-3 minutes. Cooking time will be really variable depending on how you like your steak cooked, the thickness of the steak and your hob. Once cooked to your liking on one side, flip the steaks and add 2 tbsp butter and the garlic. The butter will foam up – use this to baste your steaks for the remaining cooking time.
  6. Once the steaks are cooked, transfer to a chopping board & place the garlic on top. Cover with foil & rest for ~10 mins.
  7. Split the bread in half and toast each side in a dry pan until golden.
  8. Now for assembly, first thinly slice the steak against the grain. Spread the goats cheese on the bottom layer of the bread, top this with the sliced steak and onions. Spread salsa verde on the top layer of the bread and close the sandwich. I like to serve my sandwiches wrapped in foil to prevent structural failure while eating.

My Top Tips for Cooking a Good Steak (from lots of trial and error)

  • Always leave the steak to reach room temperature before cooking
  • Always make sure the steak is very dry before cooking to allow caramelisation to form. Do this by patting with kitchen towel & leaving out before cooking to air dry.
  • Only salt the steak just before cooking, as the salt will draw out moisture undoing all the good drying work you’ve done.
  • Cover the whole base of the pan in oil and leave to get ripping hot before adding the steak. This will allow a caramelised crust to form on the steak
  • If you have a thick fat layer, you’ll need to render this. Using tongues, hold the steak fat side down for about a minute until golden and crispy. Then continue with the cooking process above.
  • Don’t move the steak until it’s time to flip again to allow a good caramelised crust to form.
  • Add butter, garlic & herbs after the first flip and baste to get that flavour into the steak.
  • Rest for about 10mins after cooking, this way the steak will soak up all the juices it releases and stay really moist.
  • Cut against the grain, this will make it easier to bit through in sandwich form.