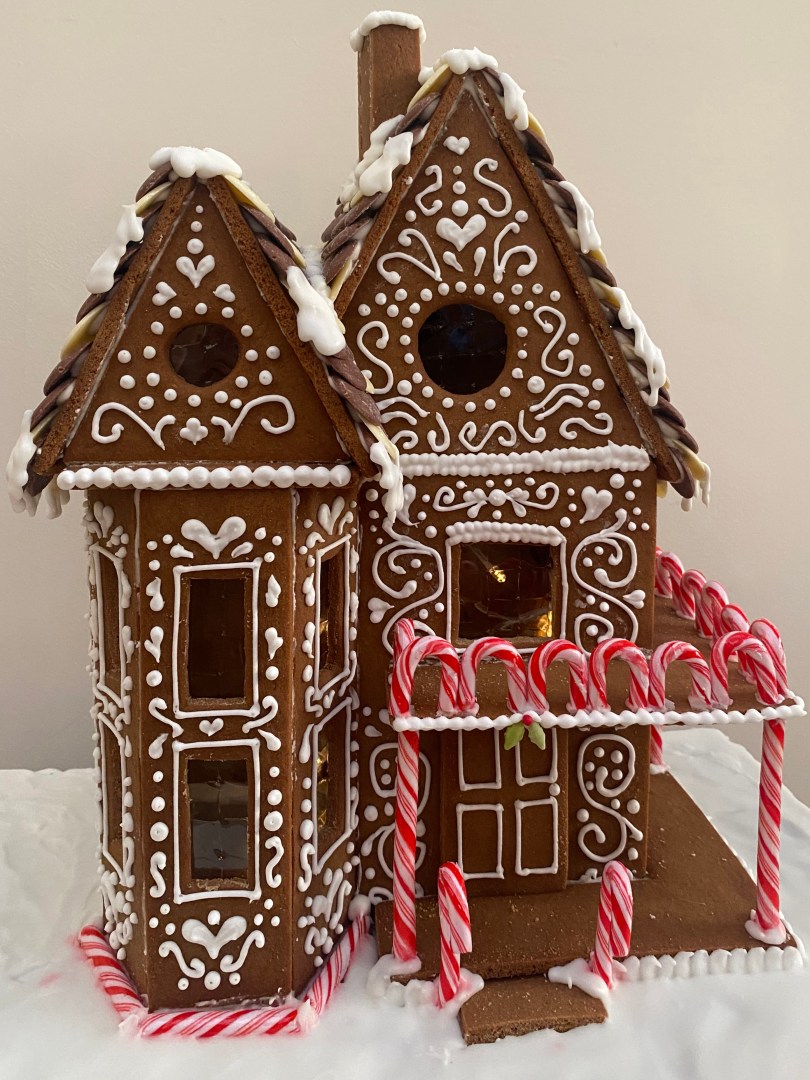
This year I challenged myself to make my best gingerbread house yet, and I think I succeeded (feedback from my family, not just me patting myself on the back). This took me about 4.5 days of baking, decorating & building – and I have 0 regrets about how I used that time. In fact, I think this is probably my favourite way to spend the days up to Christmas. It’s no surprise I love being in the kitchen, so getting to spend 4 days solid working on something while watching ‘Are You Scared?’ on YouTube (my idea of festive viewing) is kind of my dream. Plus it makes for the best Christmas decoration.
My Process
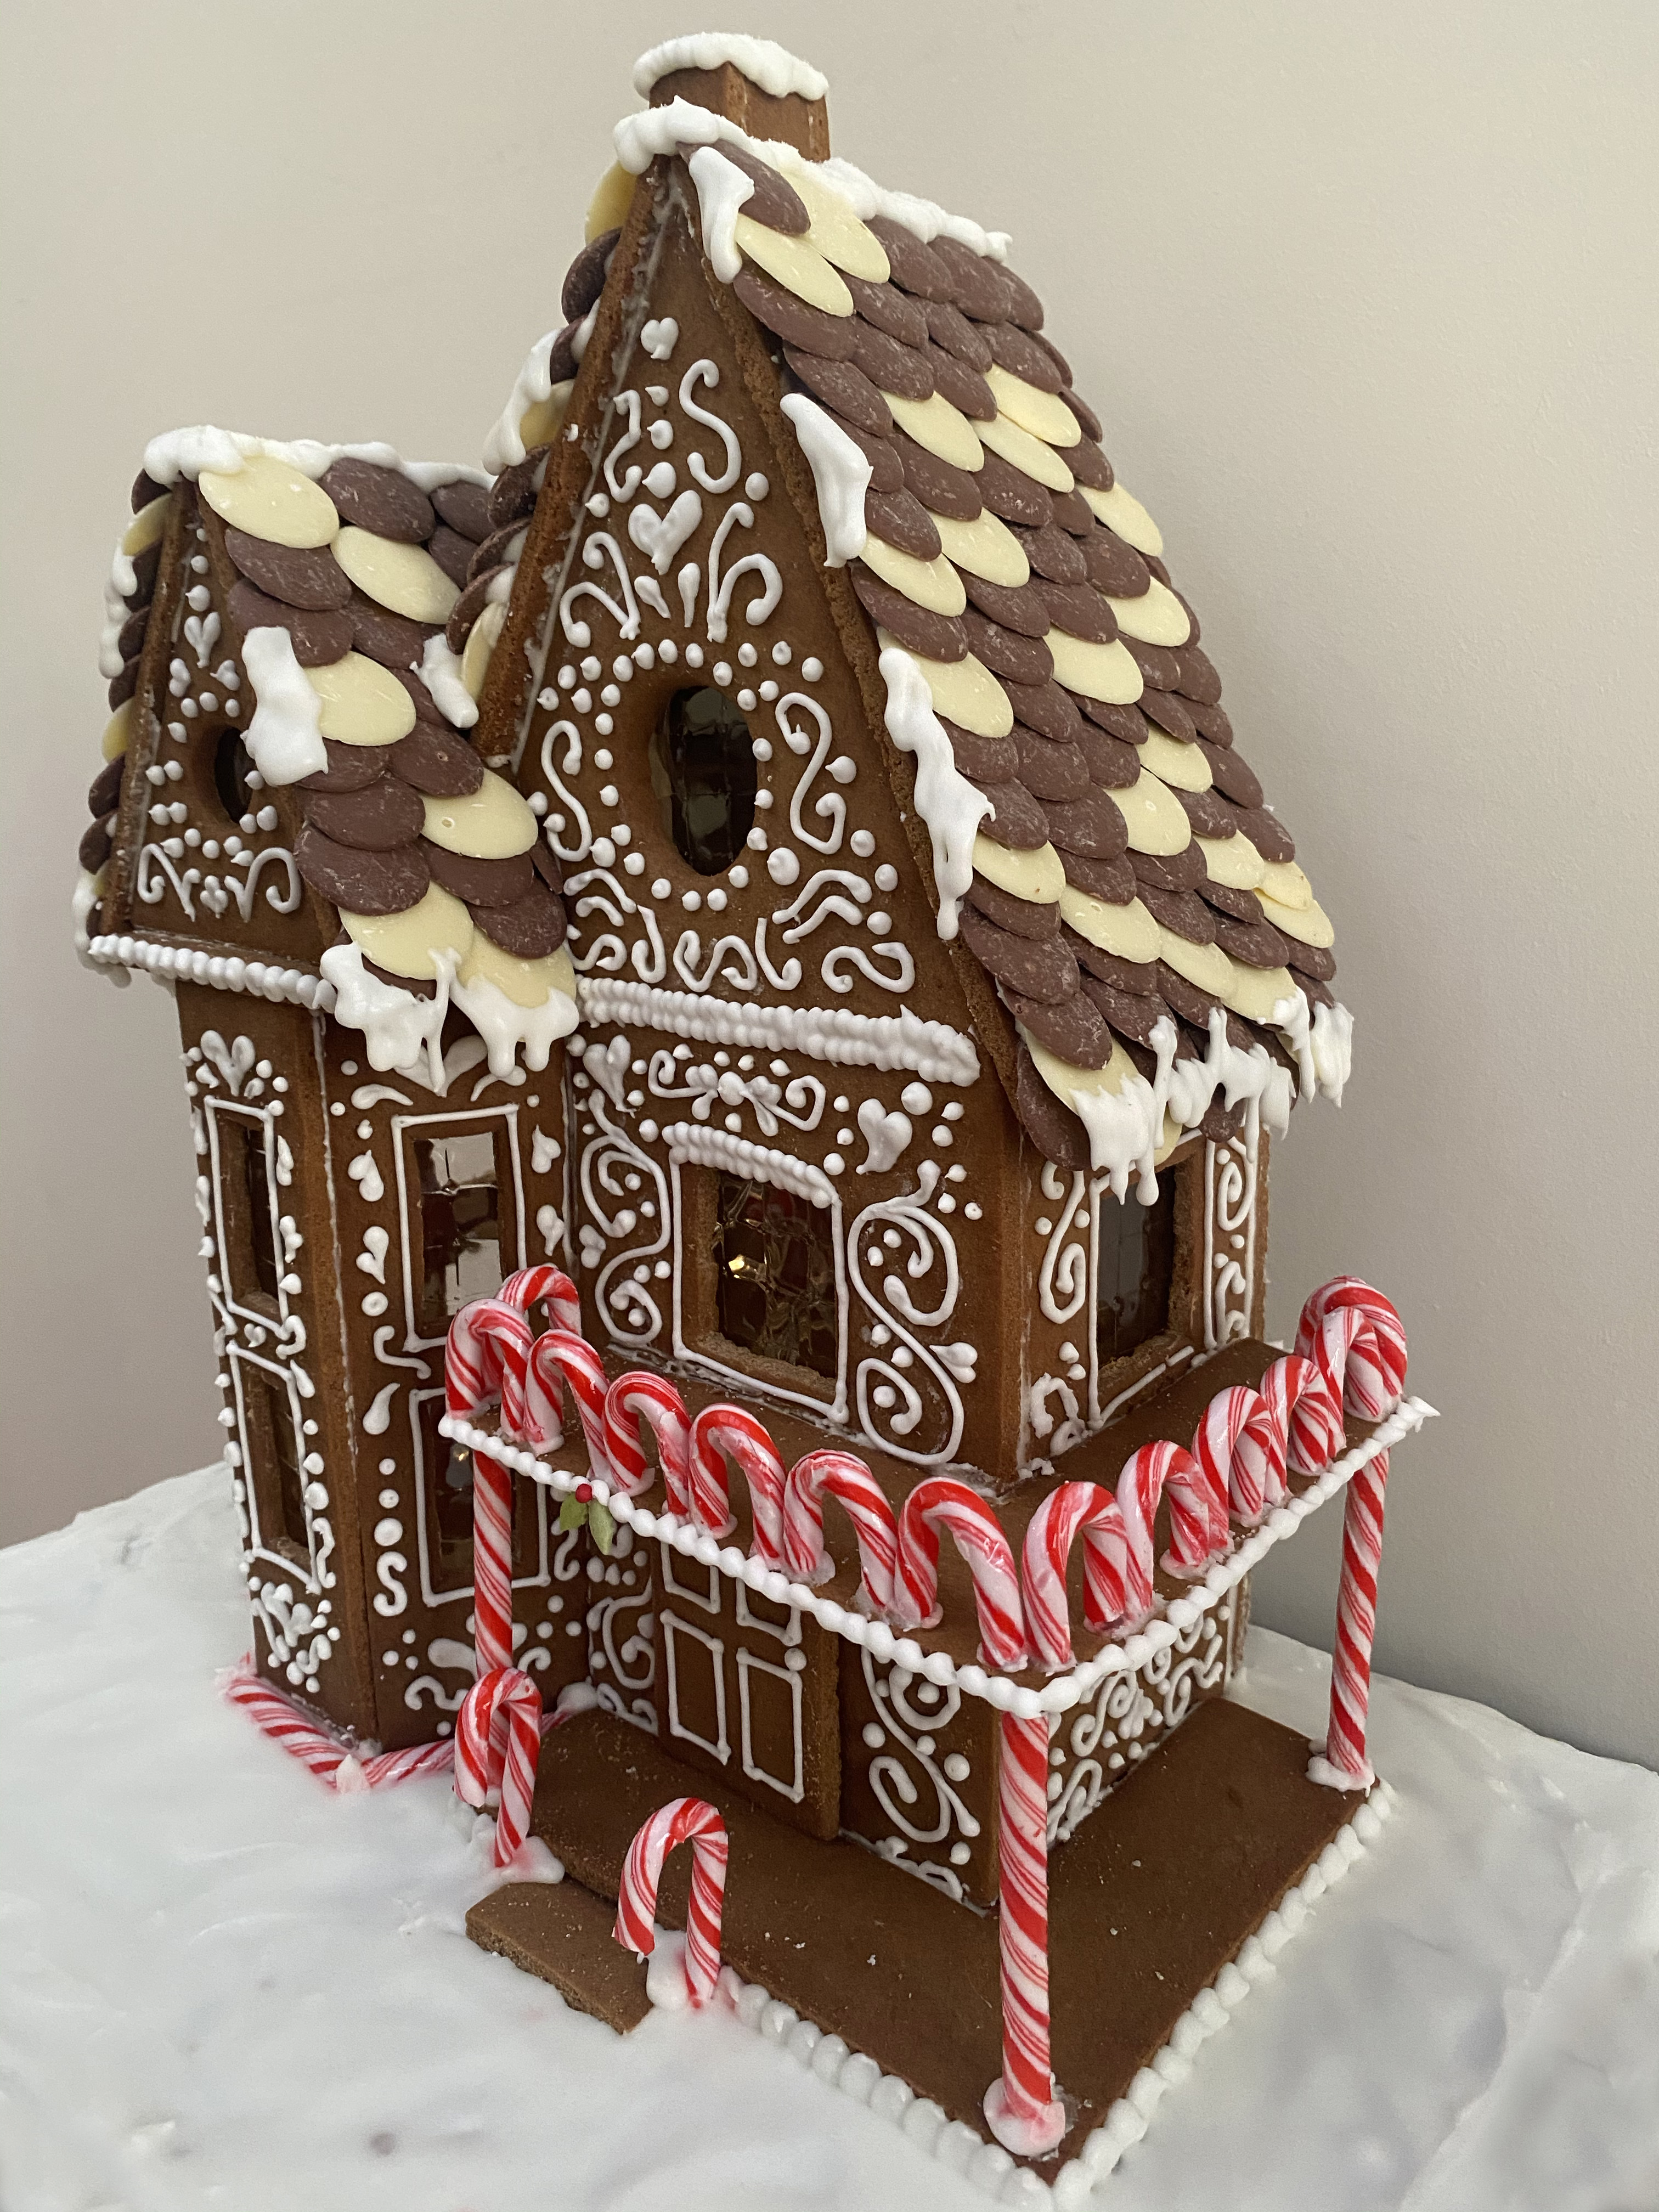
My process for making a gingerbread house starts with trawling Pinterest for inspiration – this was my board for this year. I landed on doing a Victorian style house with bay windows, a balcony and double roof. I used this house to model mine on. The next stage is I give the pictures to my engineer dad & he magically turns it into working templates. I have very little knowledge about how this part works…
Next I move onto the baking. This year I made a double batch of this BBC Good Food gingerbread recipe – the raw dough is so good I’m surprised any of it got baked up. I roll the dough about 0.5cm thick (some key pieces a little thicker for stability) & use a sharp knife to cut out around the templates.
After baking the dough expands a little so, once cooled completely, I flatten off and trim the edges using a microplane grater, checking against the templates. This makes sure the pieces will fit together flush when it comes to building. The baking & trimming took me a full day.
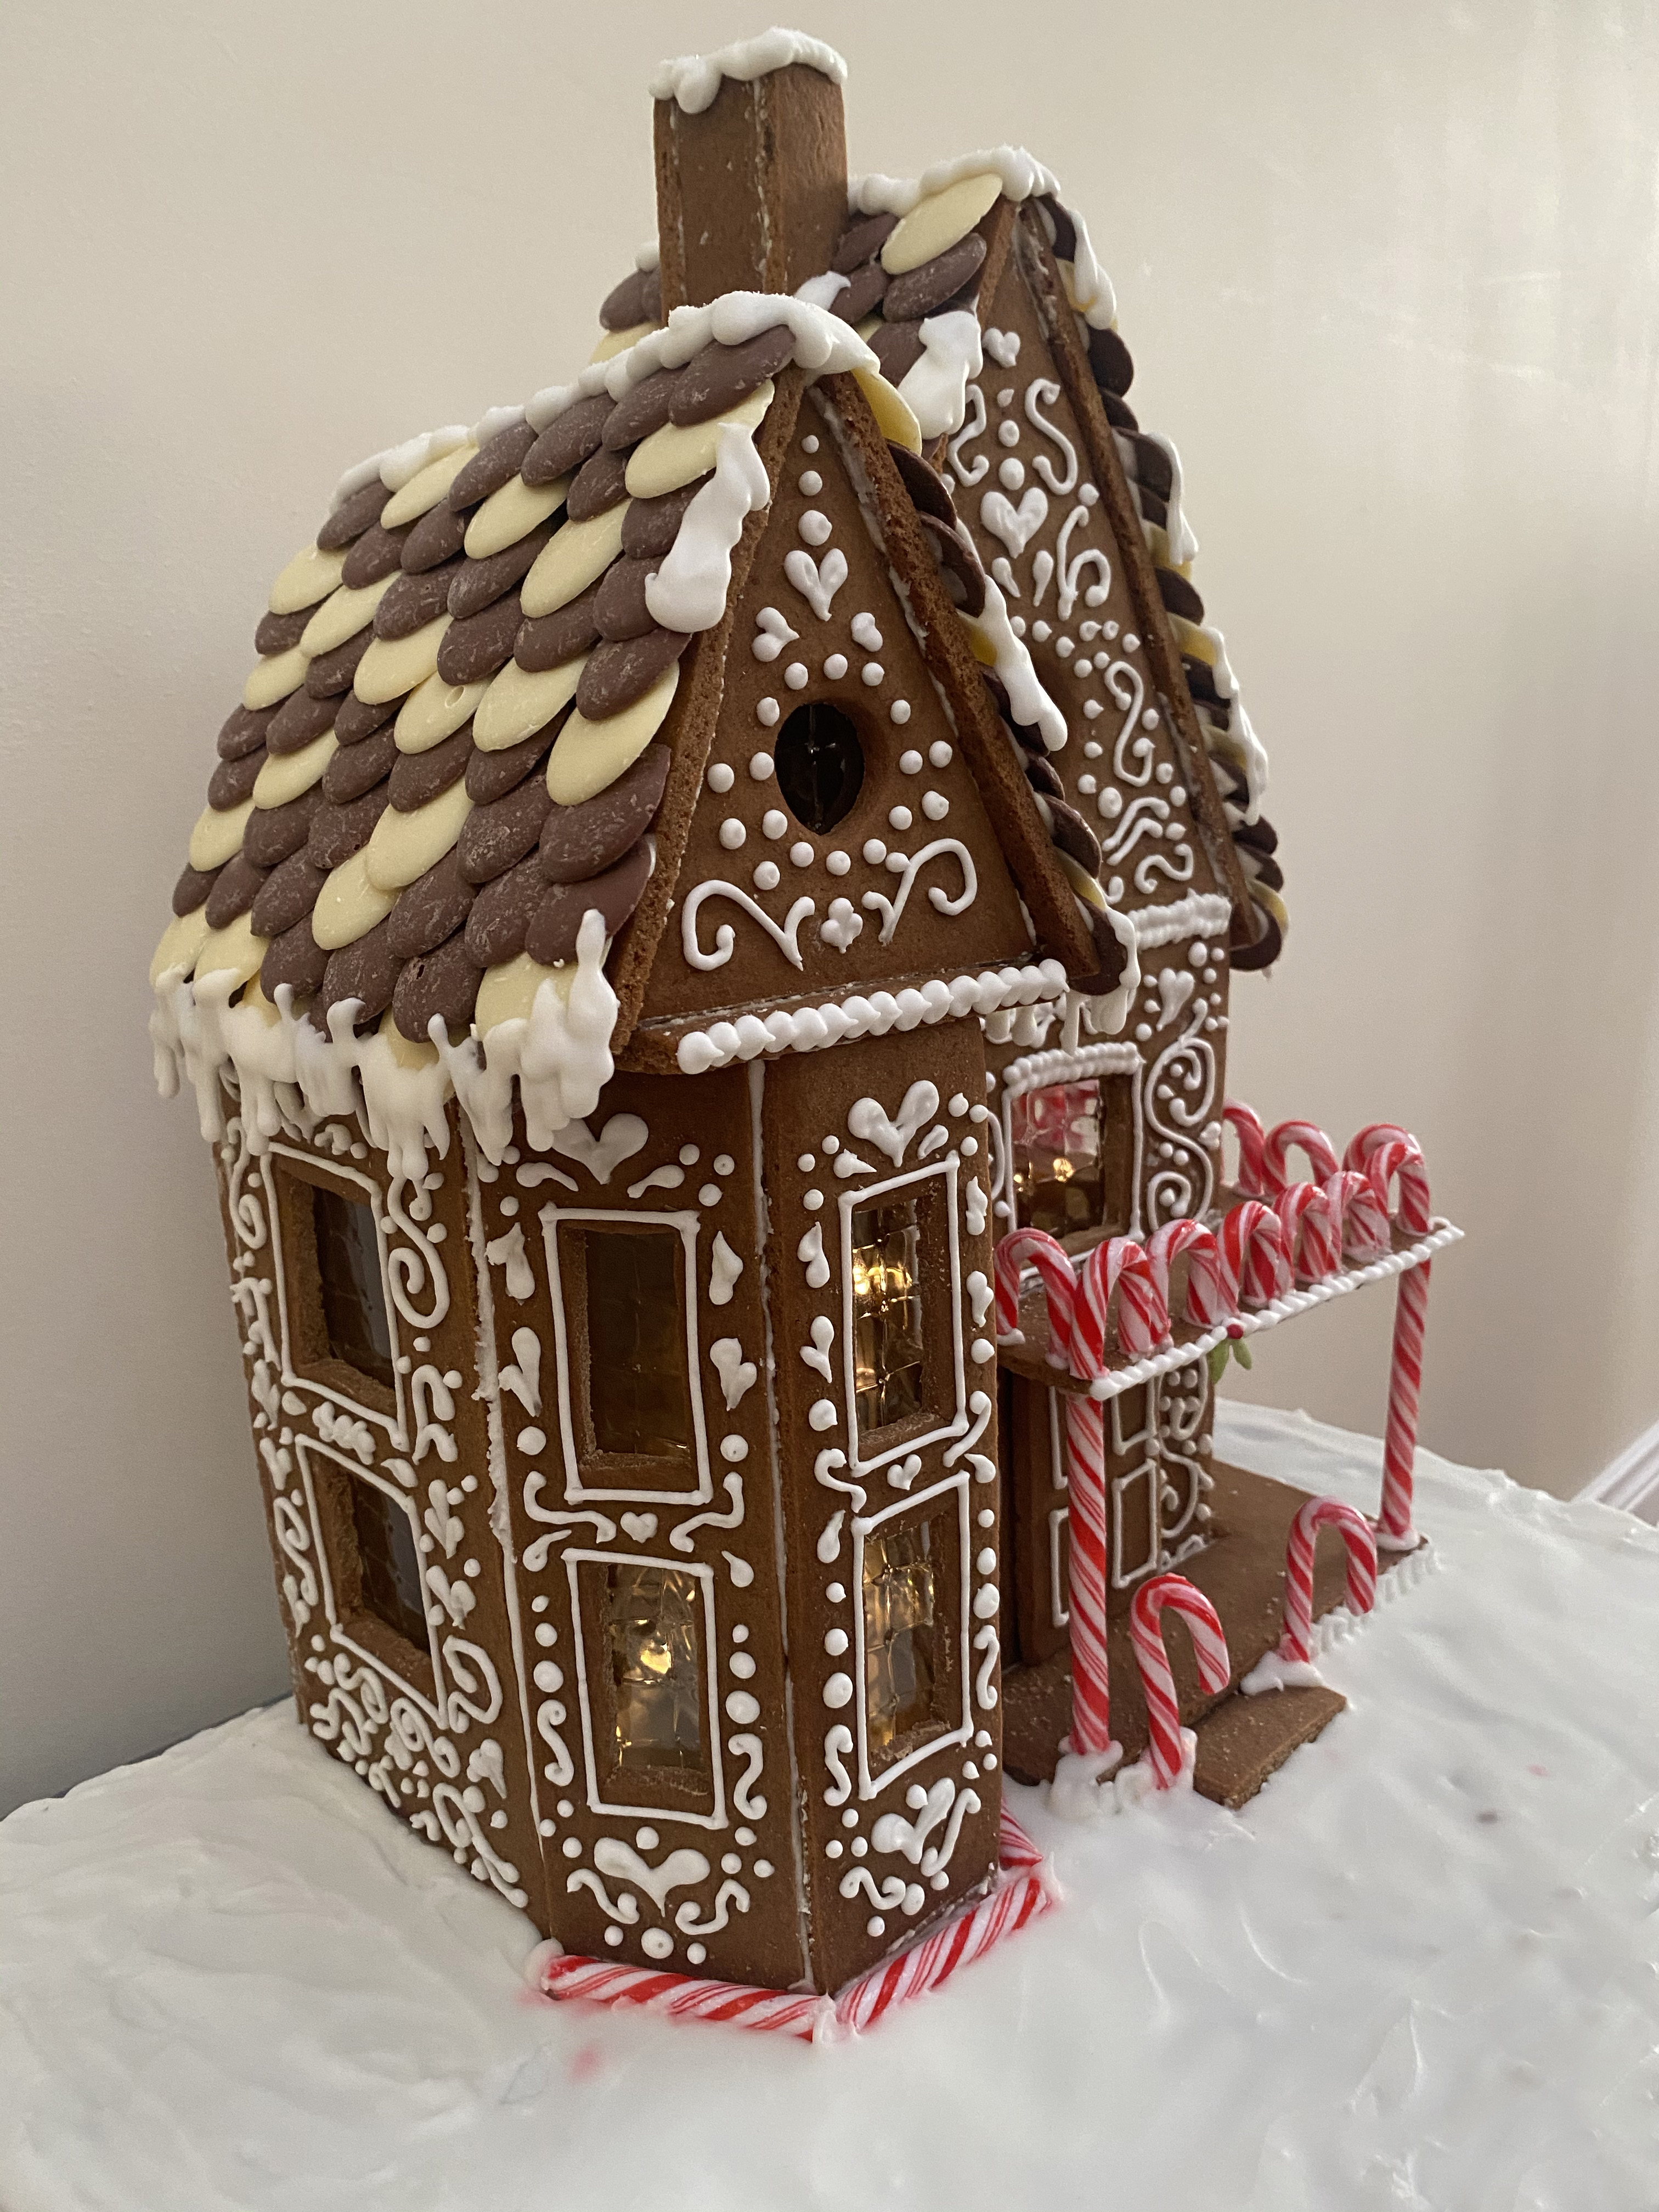
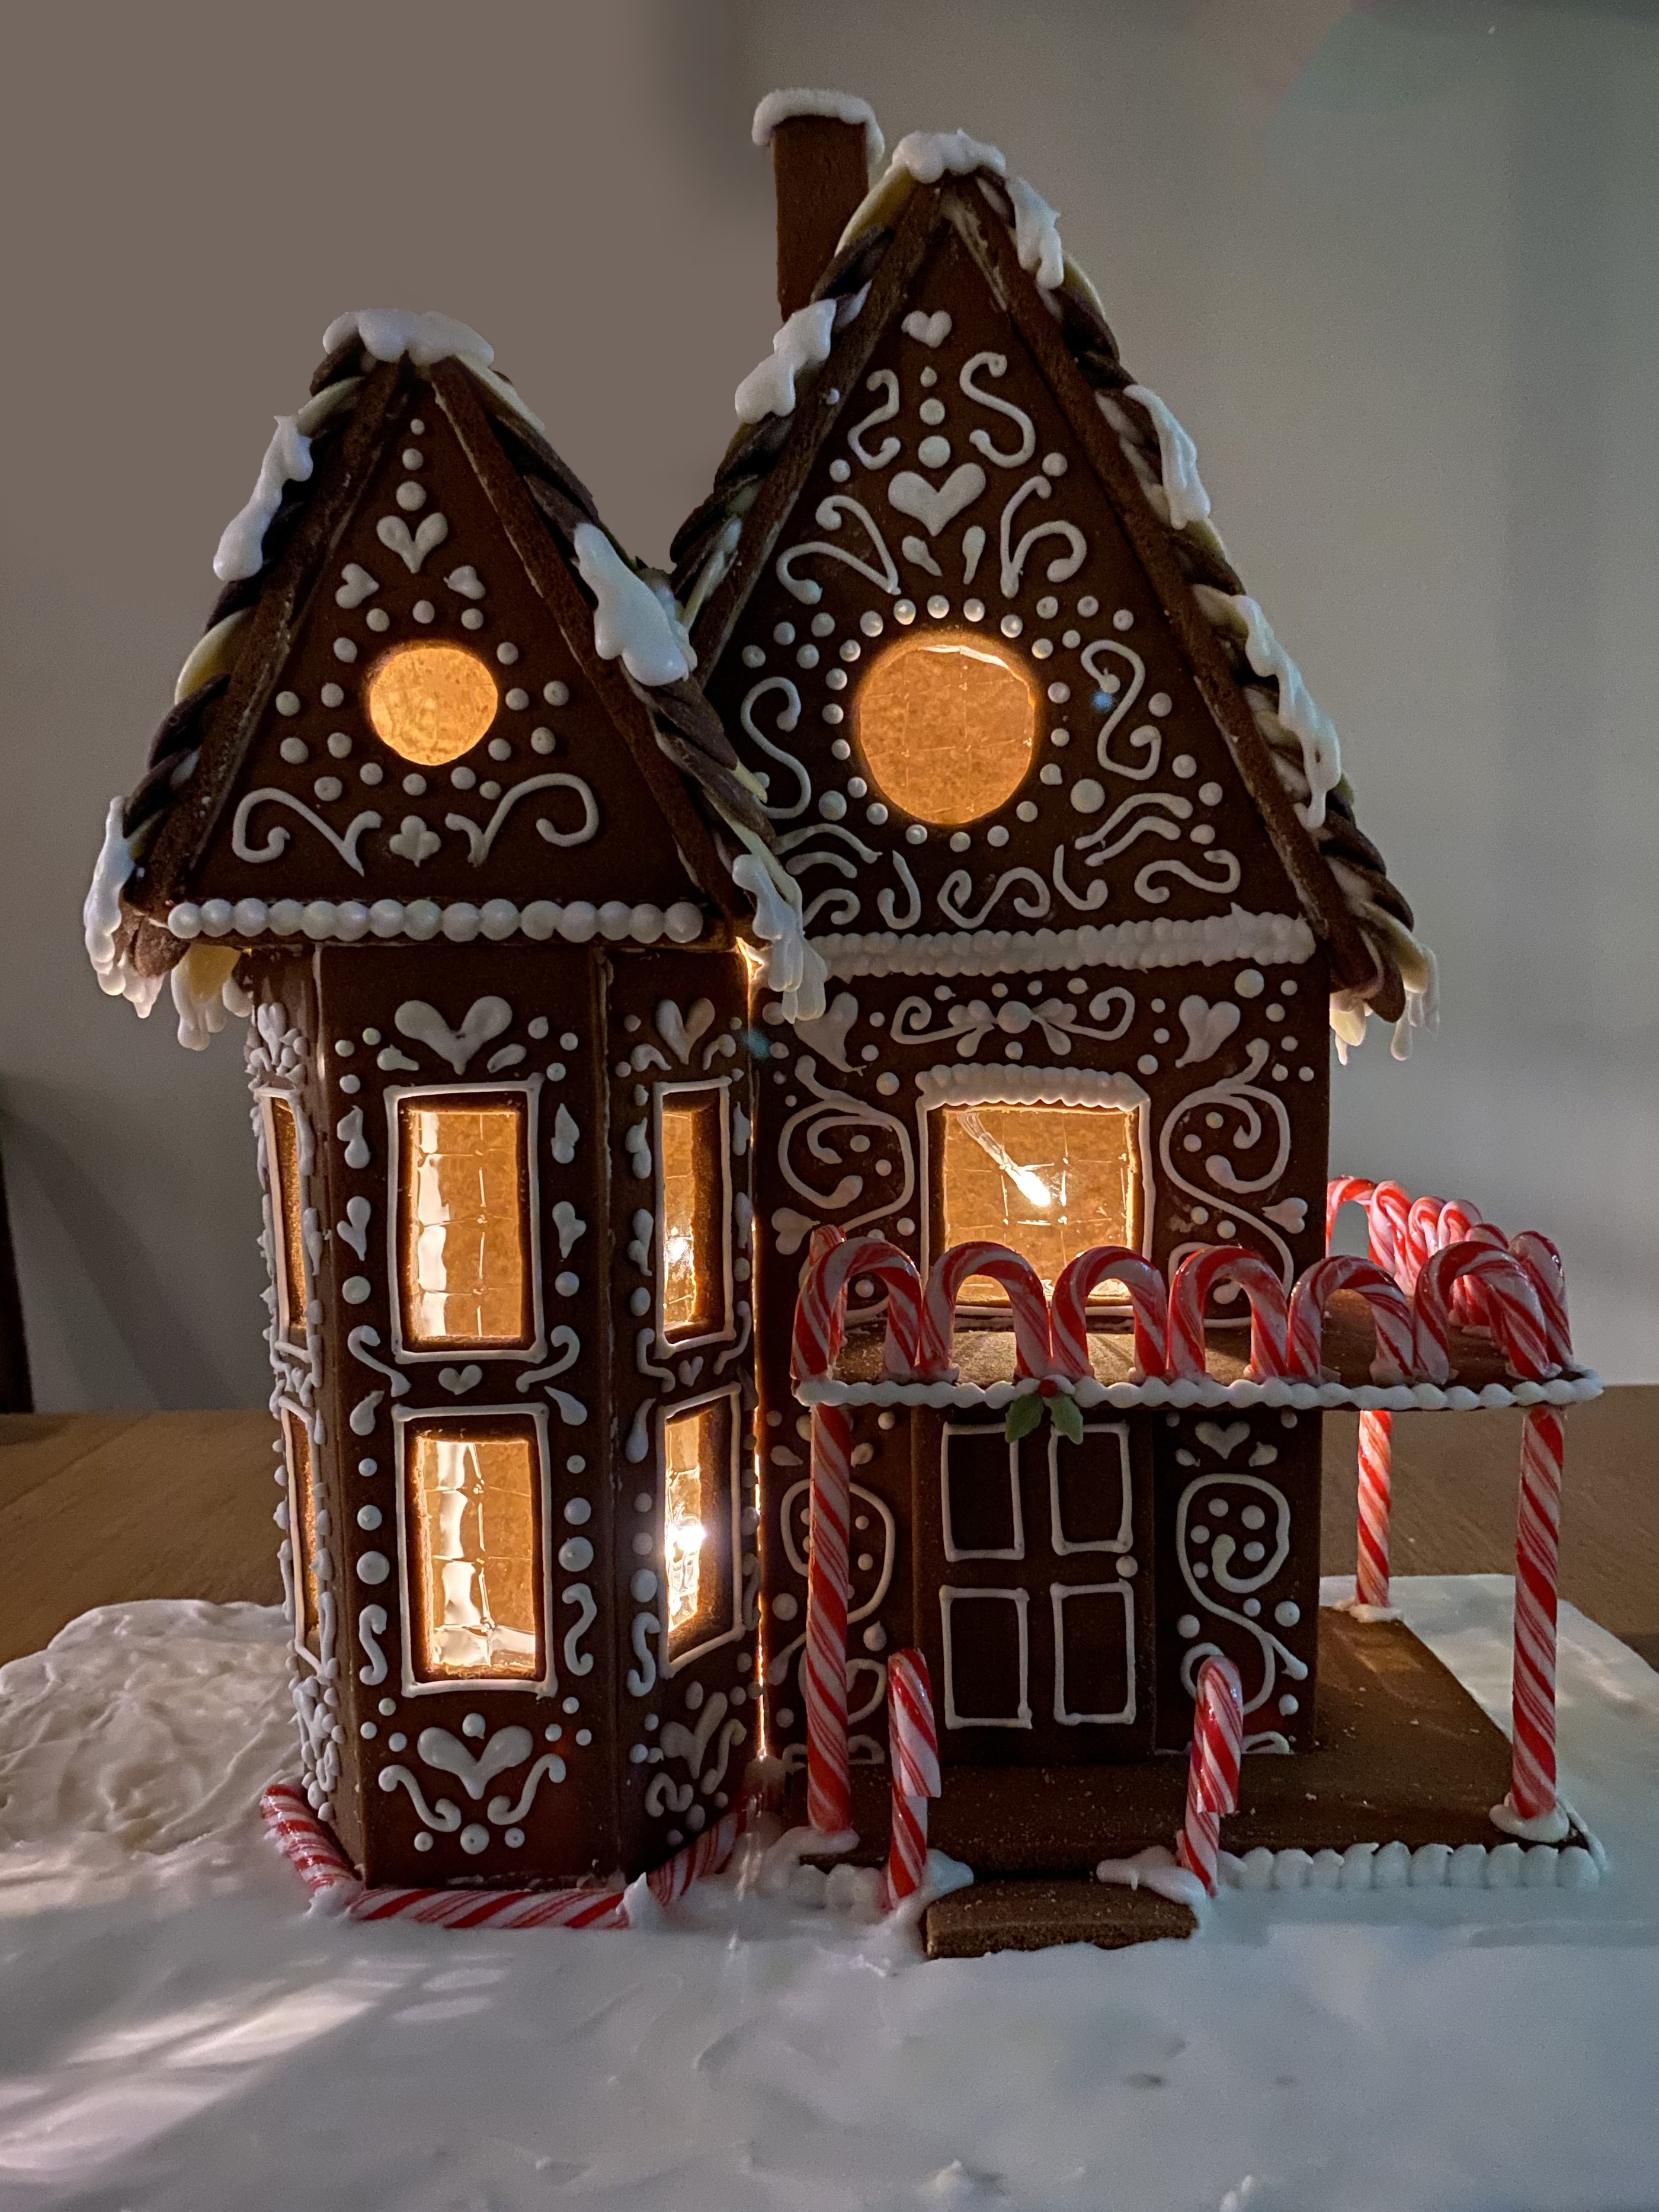
The next step is to decorate. For this I used 1 batch of royal icing from the same BBC Good Food recipe. I used gelatine leaves as window panes by attaching them behind the window with royal icing. Once these had dried enough, I flipped the pieces at did aaaall the royal icing decoration – this took me about 4/5 hours. I left these to dry for a few hours. I keep my royal icing fresh by clipping the top of the bag and covering the tip with cling film.
To build, I used royal icing on a chopping board. I first but up the walls, then left it to set overnight before attaching the roof. Then added all the external decoration pieces & candy canes. PSA: Candy canes are very hard to saw without shattering… I used chocolate buttons to tile the roof – this can only be done once the roof gingerbread pieces are fully set. I added a few icicle details & then filled in the board with royal icing (I had to make a second, slightly thinner batch to do this).
And there you have it – a mere 4.5 days of work later – a Gingerbread House! The funny thing is, I don’t really like gingerbread… So now it’s up to my family to eat it all.
Top Tips
So, having spent days on this thing I thought I’d share some of the things I’ve learnt along the way to help you make a successful custom gingerbread house:
- Spend time on the templates. It’s worth spending a little extra time on these to make sure it works, as this is hard to fix when it comes to assembly. You could even make a card mock-up to check everything fits.
- It’s better to cook your gingerbread a teeny bit longer than normal to make sure it’ll cool hard all the way through. I added 1-2 mins to the cooking time.
- Always shave the sides of your gingerbread. Gingerbread expands slightly meaning it’ll be bigger than the templates and make not fit together properly. I used a microplane grater to do this.
- Always make a few extra gingerbread fingers. These came in really handy this year when I realised one of my walls was too short. I propped it up on my extra gingerbread – which really saved the house.
- Decorate your pieces before attaching – this is much easier horizontal than it is vertical.
- When putting together the walls, pipe a little extra icing along the inside of the join for extra stability.
- I had to use dowels on the back of the pieces making up the tallest point, as these started to bend slightly as they got stale. So if you have any extra tall/thin pieces be sure to stabilise then using dowels & royal icing to attach.
- ‘Snow’ covers a multitude of sins – if something’s gone slightly wrong or a seam looks a little dodgy, cover it in royal icing and act like that was always meant to be there.