Daffodil mulligan restaurant

Daffodil Mulligan – Shoreditch, EC1

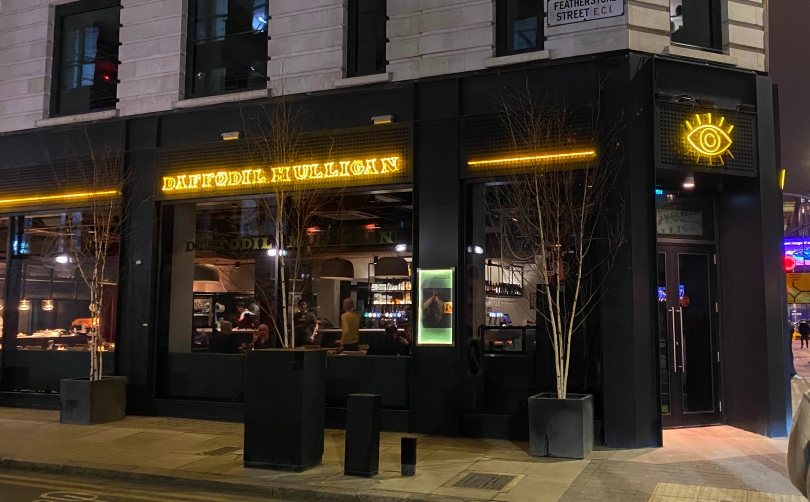
This is another one that’s been on my list for a while but I never got round to visiting. But thanks to the handy map I have of all the restaurants I’ve been recommended on my phone, when I agreed to meet some friends for dinner near Old Street, Daffodil Mulligan was the prime choice. Once I’d booked I started to do a bit of research and realised one of the founders is Richard Corrigan – at that point I knew it would be good, and I wasn’t disappointed. The decor & atmosphere feel really high end but laid back at the same time, which matches the vibe of the food perfectly.

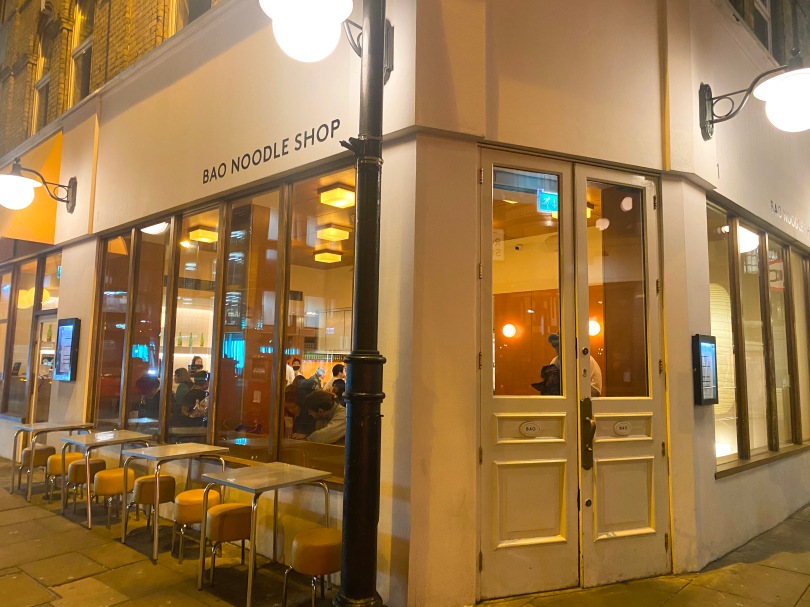
As always, we started with a drink and (as always) I got a whiskey sour. This was a perfect version of the classic whiskey sour. Now for the food. I’m usually the type of person that picks their meal the day I book it, but for Daffodil Mulligan I only chose one dish ahead of time (the sugar pit pork) and the rest I left to the waitress’ recommendation. Everything on the menu just looks incredible.

daffodil mulligan salt chilli fried chicken with pickles
Salt chilli fried chicken with mustard & chilli pickles

From the small plates we first ordered the bread with cultured butter & buttermilk which is about as delicious as bread and butter can get, which is really bloody delicious. We had a selection of sourdough & soda bread, both of which were warm, soft & delicious, which very high quality, creamy, salty butter. Next came the salt chilli fried chicken with mustard & chilli pickles. This was up there with some of my favourite fried chicken bites – the chicken was juicy on the inside, spiced and crispy on the outside. Then you dunk in the mayo (of which we ordered extra) and top with one of the pickles. The perfect bite.

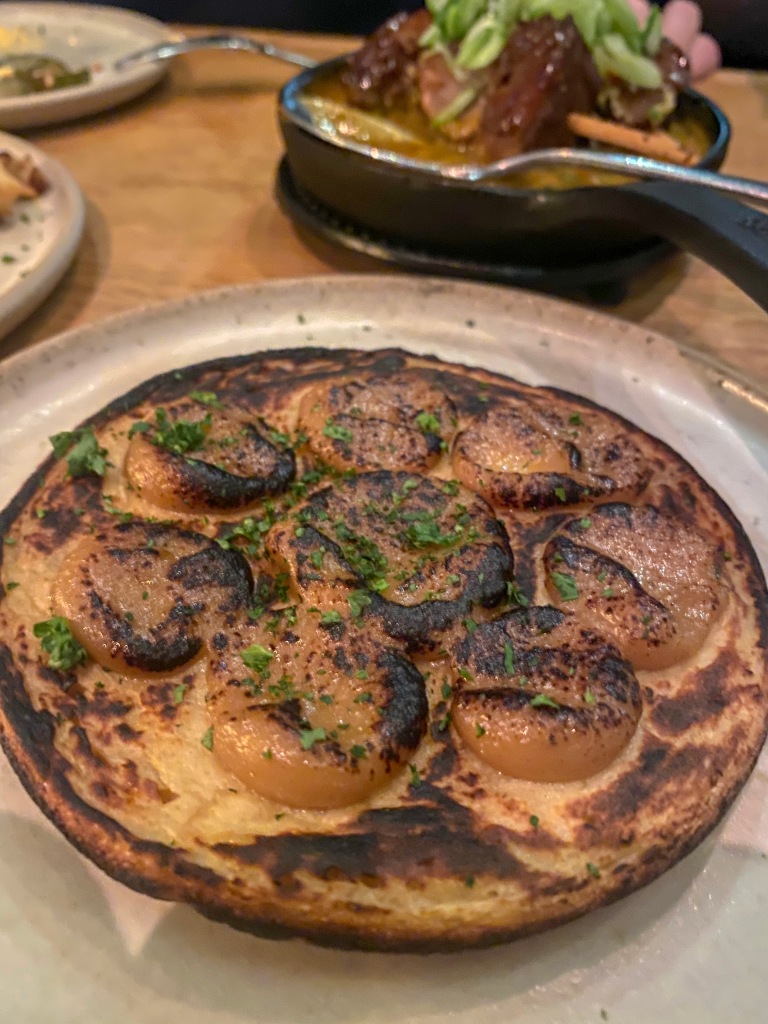
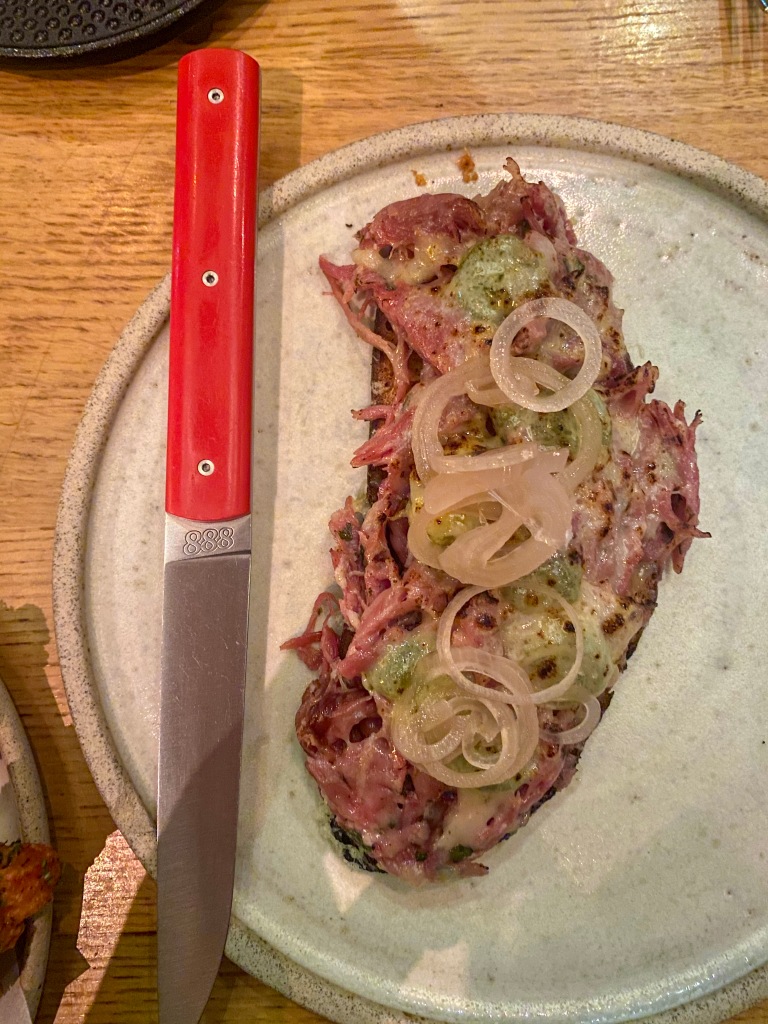
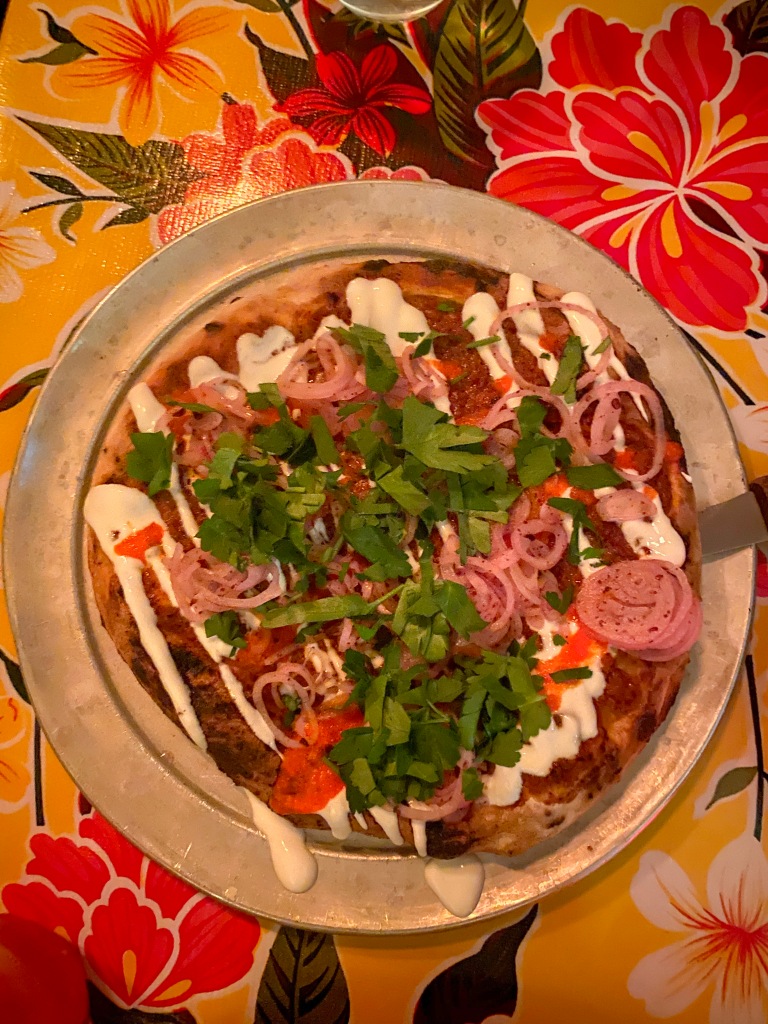
We also ordered the onion potato cake rarebit (this normally has eel in but they were out) which was also delicious. Think potatoey pancake with cheesy rarebit blobs. Next up we got the ‘Monty’ hock on toast with smoked jalapeno & pickled shallot. This consisted of a piece of toast topped with a generous helping of juicy ham hock mixed with cheddar & other delicious bits, topped with jalapenos and shallots. Another huge success.

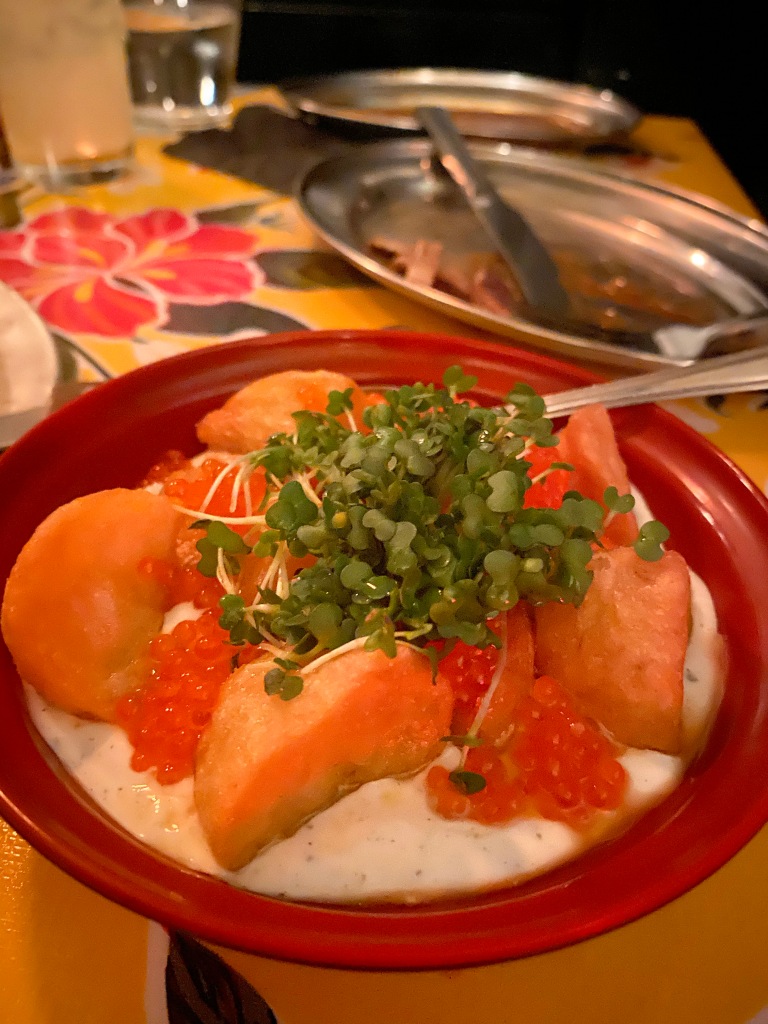
On recommendation from the waitress we got the pig cheek skewers with tamarind and brown crab ‘Chip Chop’ curry curry sauce, and the chargrilled octopus with tamarind hummus and blood orange gremolata. The pig cheek was melt in the mouth delicious and the curry sauce added such a punch of flavour I could’ve licked the bowl clean. And the octopus, I’m a huge fan of octopus done well, and the was done so incredibly well. The meat was perfectly cooked, and the tail end got really nice and crispy. The blood orange added a lovely tang to the dish.

Daffodil mulligan sugar pit pork
Sugar pit pork with salted cabbage, prawn spring roll & sour lime dressing

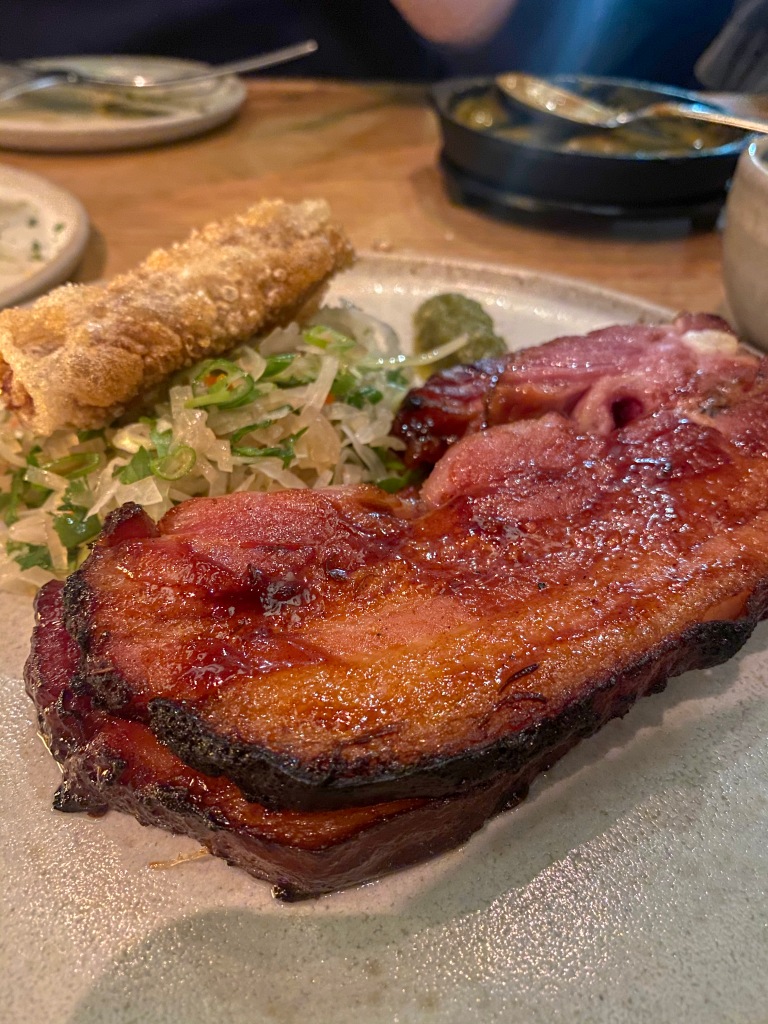
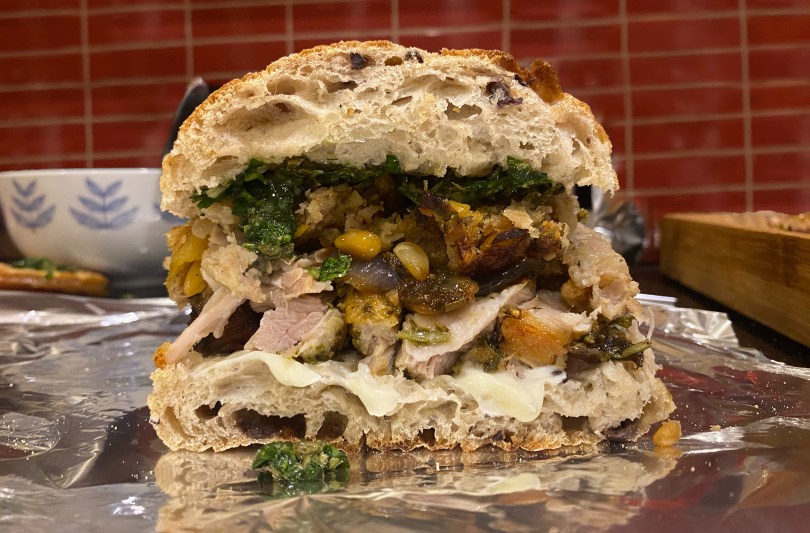
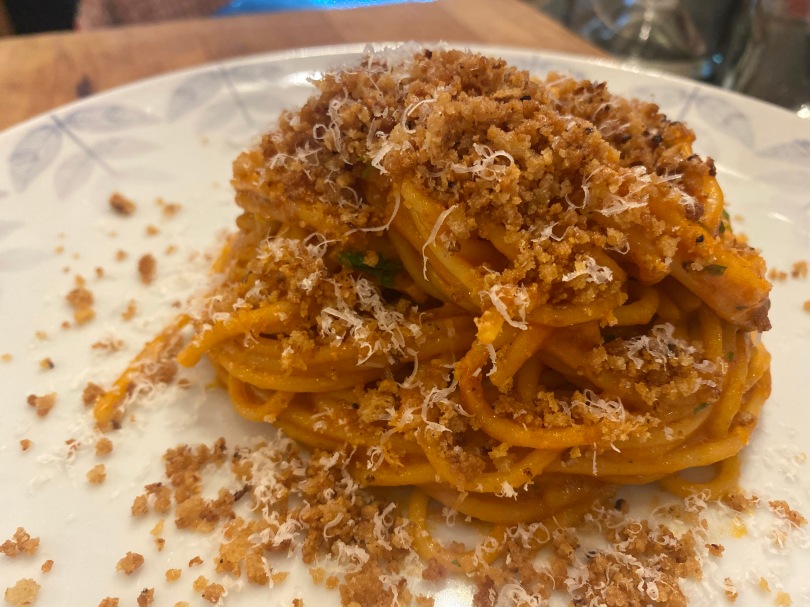
Now the the main event, the thing everyone recommends – the sugar pit pork served with salted cabbage, prawn spring roll & sour lime dressing. And let me tell you it absolutely lives up to the hype. The pork is pink and so so juicy and tender (the picture speaks for itself), and serving it with the cabbage really cuts through the richness. That crispy prawn spring roll really is a hidden gem – we needed about 5 more!

Mashed potato with smoked butter and bone marrow crumb

I need to give a special shoutout to the mash with smoked butter and bone marrow crumb. If anyone went to Pitt Cue before it closed, you’ll know about bone marrow mash and how much of a beautiful thing it is. It was amazing to relive this, but with the added crunch from the marrow crumb. Think the absolutely richest mash you can imagine with that gorgeous, fatty bone marrow taste. I could eat 10 servings of this.

Daffodil mulligan chocolate choux with caramel and yuzu
Dark chocolate choux with caramel and yuzu

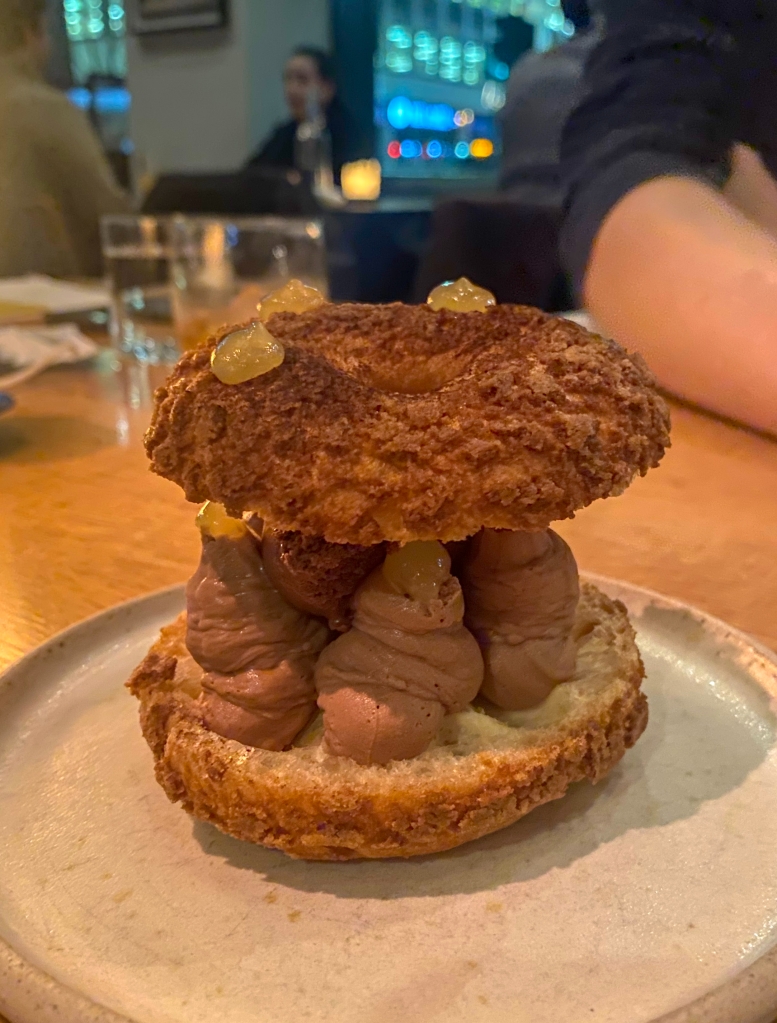
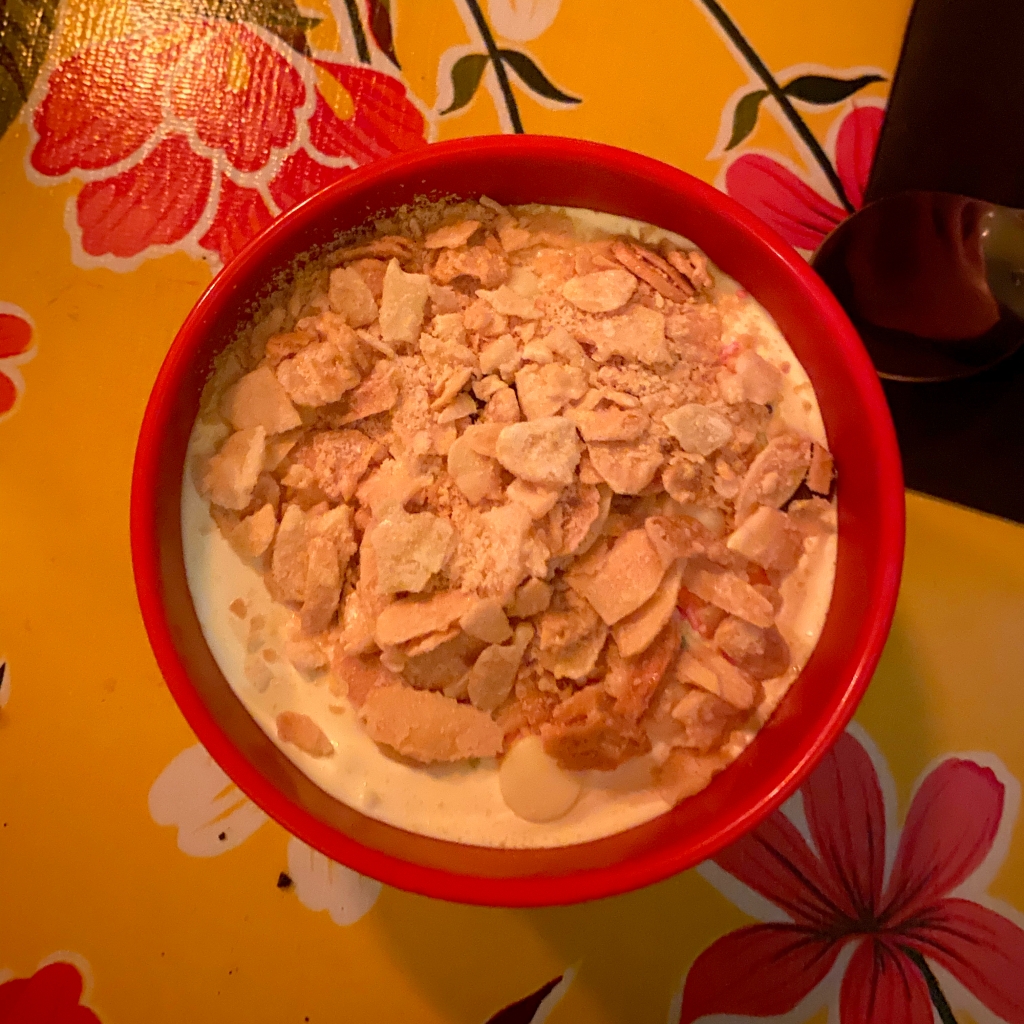
And after all that food, I still had space for dessert because, as my brother always said, dessert goes into the pudding stomach, which is different from the savoury stomach (and yes it houses Yorkshire puddings too). I got the chocolate choux with caramel and yuzu. I feel like I keep saying on here that I’m not a huge chocolate fan, and then ordering chocolate desserts – but I swear its true. This one was so light owing to the super crisp choux & and airy ganache, and any richness was cut through by the fresh taste of the yuzu.

This was an absolutely fantastic meal, every plate was incredible – there were no disappointments at all. I actually don’t think I could rank the dishes, they’re all equally as incredible. I’ve tried to pick a favourite but I keep picking one, and then remembering another until I’ve gone through the whole list of dishes about 3 times. Honestly, you have to try this place. I can’t wait to go back and taste the rest of the menu. If you’ve been, or go after reading this let me know what you think in the comments!

Find them at 70-74 City Rd, Old Street, London, EC1Y 2BJ.

Italian Sausage Detroit Pizza

Italian Sausage & Red Onion Detroit Pizza

I’m not sure what inspired this but over Christmas I was just absolutely craving a Detroit pizza, having never had one before… For those of you who haven’t had the joy of trying a Detroit pizza, it’s a much breadier version of its Italian counterpart. Think along the lines of a focaccia with pizza toppings. The crust is thick & chewy with big air bubbles – it’s also rectangular. Basically all round delicious – a dream for bread lovers.

For this, I don’t have my own dough recipe as I’m not a bread-master but there’s lots of great options if you search for it. The toppings are a creation of my own though: my marinara, Italian seasoned sausage, red onions & a grating of pecorino once cooked. I’m getting hungry thinking about it…


Italian Sausage & Red Onion Detroit Pizza

Serves 4-6 (4 very hungry people) | 1 hour prep + proving time (depends on dough recipe used)

Ingredients

~700g dough of your choice (see notes)

1x my marinara sauce, cooked for pizza as per the instructions

1x my italian seasoned sausage

500g low moisture mozzarella grated (see notes)

1 red onion, thinly sliced

Grated pecorino to serve

Olive oil for greasing

Pan or pans totalling 1,500-,1600cm² – these need to be a baking tray about 2-3cm deep. I used 2 trays ~20cmx40cm each

Method

  1. Brush you pan(s) with olive oil. Split your dough in half and transfer to the pans. Rub more olive oil on top of the dough. Now leave to rest again covered loosely with cling film for ~1hour in a warm place.
  2. In the mean time, fry the sausage meat in a large pan with olive oil over a medium heat. Break into chunks, and cook until almost cooked through. You don’t want much too colour on the sausage as it will continue to cook in the oven. Set aside
  3. Preheat the oven to 230°C/210°C fan
  4. Push the dough to fill the pan & dimple with your fingertips.
  5. Sprinkle over the mozzarella then spoon over the, marinara in even strips. Next scatter over the sausage and sliced red onion.
  6. Bake until deeply golden (30-40 mins).
  7. Remove from the oven & leave to cool for 5 mins. Remove from the pan, sprinkle over the pecorino and serve!

Notes:

Dough – If you Google Detroit Pizza recipes there are lots of great options for doughs

Mozzarella – In the UK we can’t get blocks of low moisture mozz so we have to use the grated stuff. In this case you’ll need to wash the mozzarella to get rid of the starch (this is used to stop the cheese sticking to itself, but it’ll also stop you getting a nice melt). Put the cheese into a sieve and rinse under cold water until the water runs clear. Spread the cheese in a thin layer onto paper towels and leave to dry.

Italian Sausage Meat

Basics By Meg: Italian Sausage Meat

Number 2 in my basics collection is an absolute staple for pizza, pasta, sandwiches etc. etc. – Italian seasoned sausage. This is similar to my Italian sausage roll mix but slightly less strong (i.e. no anchovies & no parmesan) in order to make sure it complements the dishes it’s added to. I love this fried up in chunks & scattered over a pizza, squashed into a patty & fried for in a breakfast muffin, or anything really. I have a few recipes using this sausage coming up so keep your eyes peeled for ideas of how to use it. This can be subbed into any recipe calling for sausage meat if you want to add an Italian twist.


Italian Sausage Meat

Makes 400g | 10 mins prep

Ingredients

400g sausage meat

2 large garlic cloves, minced

Large handful parsely finely chopped

2tsp fennel seeds toasted (or fennel pollen if you can get your hands on it)

1 tsp dried thyme

1 tsp dried oregano

A few shakes of chilli flakes

Salt & black pepper to taste

Method

  1. In a dry pan over medium heat, toast the fennel seeds tossing often until fragrant. Leave these to cool & grind in a pestle & mortar (or coffee grinder, or chop with a knife – be prepared for them to pop out as you chop)
  2. Combine all ingredients in a bowl & mix thoroughly.
  3. Taste & adjust seasoning by frying up a small batch.

Note: I definitely recommend fennel pollen if you can source it as it adds the fennel flavour plus some extra delicious aromatics.

Bao noodle shop

Bao Noodle Shop – Shoreditch, E2

Bao has been a long-time firm favourite of mine. I have fond Lockdown 2 memories of sitting on London Fields Park with my friend Corey, absolutely frozen eating a classic bao from Netil market. So obviously the noodle bar has been on my must-visit list since it opened, and I finally took the trip last week – naturally with my bao-buddy Corey. I always love Bao, and this was no exception. The food is always so exciting and really well executed, and the decor is like being on the set of a Wes Anderson film, with ’emergency noodles’ lining the wall (my kind of emergency supply stash).

bao noodle shop cocktails
L: Umesgu Negroni, R: Sweet Potato Sour

We started off with cocktails. I had the sweet potato sour (gin, chestnut & sweet potato) which was an incredible drink. It had the rich smooth feel of a whiskey sour (which is quickly being exposed as my favourite drink), but it was sweeter and rounder owing to the chesnut, and without the whiskey burn. Corey had the Umeshu Negroni (plum sake, gin, campari & vermouth) which tasted like a very good negroni – neither of us picked up the plum sake.

We were recommended 3-4 starters to share, and a noodle dish and a bao each. For starters we chose the cull yaw dumplings, the Ogleshield cheese rolls and the crispy tripe with spring onion dip. All three were delicious. The dumplings were unanimously the best dish of the evening. The lamb filling was so savoury & deep in flavour. Completely different to any dumpling I’d had before. The cheese rolls, while delicious, were slightly less exciting than the other dishes. They were very cheesy, crispy fried rolls – what’s not to love. The tripe was a real revelation though. As someone with mild trypophobia I’ve always been put off by the look of tripe. But this being a dish of breadcrumbed strips of tripe, I didn’t encounter any appearance issues. The tripe was melt in the mouth, which was a texture I was really not expecting, but the spiced breaded coating is was made it so special. For any tripe newbies – this is your entry tripe. I am a convert!

Bao Noodle Shop crispy tripe
Crispy tripe with spring onion dip

Now onto the namesake – the bao. We got a bao each: I got the Iberico and Corey got the prawn croquette. Both delicious. The iberico felt really special – the meat was so tender and juicy. I think this may even take the top spot as my favourite Bao bao. The prawn croquette was also delicious – I compared it to really high quality prawn toast.

Bao Noodle Shop iberico and prawn bao
Iberico bao at the front, prawn croquette at the back

For main there were 2 beef noodle options: the slow-cooked beef cheek and short-rib noodles, and the rare beef rump noodles (served with a soy egg yolk). We both went for the latter, swayed mainly by the egg yolk. This dish was also incredible. Slightly chewy noodles, a DEEP rich beefy broth, super tender beef rump strips and the salty egg yolk for beef dipping. Absolutely delicious. Can’t wait to go back and try the short-rib and the dan dan tofu noodles. And of course, I rounded off the meal with a purchase of a one of their iconic tote bags.

Meg & Corey Ratings

This is another meal where absolutely everything was delicious – there were no duds. So remember in this ranking, even the things at the bottom are fantastic, they just have tough competition

Meg

  1. Cull yaw dumplings
  2. Iberico bao
  3. Crispy tripe
  4. Rare beef rump noodles
  5. Ogleshield cheese rolls

Corey

  1. Cull yaw dumplings
  2. Praw croquette bao
  3. Rare beef rump noodles
  4. Crispy tripe
  5. Ogleshield cheese rolls

Let me know who you agree with in the comments!

This was another incredible meal by bao – they never seem to miss. Every part of the menu is so different & well thought out – and then perfectly executed. If you haven’t yet had the chance to visit the Bao Noodle bar, we highly highly recommend you do. Let me know what think of it in the comments if you’ve already been, and let me know if you go from this recommendation!

Find them at 1 Redchurch Street, London, E2 7DJ

Meg's Perfect Spaghetti Carbonara

Meg’s Perfect Carbonara

I would like to say as a disclaimer I am not Italian, and I apologise if this recipe does not represent a traditional carbonara. I am merely a super-fan of the Italian cuisine who happens to have made a delicious carbonara recipe. As a word of warning, this is probably the richest carbonara you will have, owing to the use of an egg and an egg yolk per person, so be prepared to be very full if you make this. This is not your everyday carbonara – you have been warned.

You may find it odd I only use parmesan and no pecorino, but I actually prefer an all parmesan carbonara (again, sorry) – so feel free to half & half pecorino & parmesan if you so wish. The thing I will definitely stick to tradition for is the guanciale. If you can get your hands on it I reaaaally recommend using guanciale. It adds a much deeper flavour than pancetta and really elevates this dish. I get mine from Eataly usually, but I’ve also ordered it from Lina Stores who ship nationwide! This is the product of endless carbonara trial & errors, until I found the perfect egg/egg yolk/cheese etc. balance. I am finally here sharing with you my perfect, foolproof carbonara: the dinner to wow anyone made in under 30 mins.


Meg’s Perfect Carbonara

Serves 2 (hungry people) | 20 mins prep & cooking

Ingredients

200g pasta of your choice (my personal faves include paccheri, rigatoni & linguine)

150g Guanciale chopped into chunks (or pancetta if you can’t get your hands on guanciale, but the guanciale really adds the ‘wow’)

2 whole eggs

2 egg yolks

75g grated parmesan (or half pecorino, half parmesan)

Freshly ground black pepper (you won’t need much if you’re using guanciale)

Method

  1. Cook your pasta in a pot of water salted like the sea for 2-3 mins less than instructed on the packet.
  2. In the meantime, add your guanciale to a cold frying pan and bring up to medium/high heat. This renders out he fat giving you extra crisp and completely not flabby fat (ew). Drain any excess oil and set aside off the heat until the pasta is ready.
  3. Beat your eggs, egg yolks, parmesan and freshly ground pepper until combined. Add 3-6 spoon fulls of pasta water (this depends how loose your like your sauce, 3 spoons will be a drier sauce) to your egg mix one by one, beating the whole time to temper your eggs and help prevent scrambled egg pasta
  4. When the pasta is done, transfer it to your guanciale pan and return to medium heat being sure to reserve the pasta water.
  5. Add a ladle of pasta water to the pan and cook until almost disappeared. Check if your pasta is cooked to your liking, if still a little too firm repeat this stage.
  6. Once the pasta is cooked, take the pan off the heat and add your egg mix to the pan while constantly moving the pasta. Keep tossing the pasta while moving between off the heat & on low heat (this helps you keep more control of the cooking, and stop the eggs scrambling)
  7. Continue this process until the sauce has thickened and clings to the pasta. Exactly when the sauce is done depends on how you like your carbonara, but you need to cook long enough for the eggs to be cooked thoroughly. You can add some extra pasta water here if you want your sauce a little looser.
  8. Serve with extra parm and some freshly cracked black pepper
Squid Ink Flatbread F.K.A.B.A.M

F.K.A.B.A.M (Formerly Know As Black Axe Mangal) – Highbury & Islington, N1

After being recommended this restaurant countless times I finally went & brought one of foodie-est friends with me (Ros) – and I’m annoyed at myself for not doing it sooner. For those of you who don’t know, F.K.A.B.A.M is a Turkish inspired restaurant right opposite Highbury & Islington station with absolutely (and completely deserved) rave reviews. The moment you walk in the door you get hit with the smell of food & the smoke coming from the wood-fired oven. Everything about this place is in-your-face: the food, the decor, the soundtrack & we loved every second of it. Lee Tiernan (chef & co-owner of B.A.M) says that if you don’t like loud dining, BAM is not for you – and he’s not wrong. Luckily we love it!

Whiskey Sour F.K.A.B.A.M
The legendary whiskey sour

We went for the tasting menu (£45 each) & added on one of the extras – the lamb offal flatbread (£12). But before we get onto the food I need to talk about their whiskey sour (£9.5). Now I love whiskey sours, & I’ve had one in about every bar I’ve been to but this was by far the best and most exciting whiskey sour I’ve ever had. First of all, it’s pink. Second of all, it just tasted like no other. I had to ask what made it so amazing – it’s hibiscus & their sour mix, & raspberry powder on top. This drink was one of the highlights of the night which is really saying something because the food was spectacular.

Flame Grilled Short Rib F.K.A.B.A.M
Flame grilled short rib (photo credit to @rosontour)

So, onto the food, the bit you’re all waiting for. They release their tasting menu for the coming days in a post on their Instagram – it changes quite regularly. The first dish we got was flam grilled short ribs. That was the whole description on the menu, which really didn’t prepare us for just how exciting the dish was. The sauce was like nothing else. When the waitress took this dish away I told her how amazing it was & she asked if we drank the sauce (we did) which I think shows you how amazing it is. Not the most exciting to look at, but easily one of the most exciting to eat. I think I spent that entire rest of the meal thinking ‘if this dish came with a jug of the short rib sauce it would be perfect’…

Crispy Potatoes Lamb Flatbread F.K.A.B.A.M
Crispy potatoes & lamb offal flatbread (photo credit @rosontour)

Next up we had the fried potatoes, creme fraiche & trout roe, and the lamb offal flat bread. The potatoes were crispy, the creme fraiche sharp & creamy, and the trout were like little salty popping boba. Everything complemented everything perfectly. The flatbread was also delicious – soft, chewy bread topped with deeply flavoured lamb offal – what’s not to love. This had a bit of a kick so we were happy to have the potatoes at the same time to spoon some of the creme fraiche on top.

Once those plates were cleared, it was time to move onto their iconic & most famous dish – the squid ink flatbread with smoked cods roe & an egg yolk. I can confirm there is a reason this is famous. Again, this dish was absolutely perfectly balanced & so well thought out. First things first, we obviously popped the gooey egg yolk for some instagram worthy egg porn, then smeared that & the cods roe all over the flatbread for the perfect bite. We were shocked by how creamy that cods roe was – I still dream about it. AND they’ve released this recipe if you want to try it at home for yourself! Ros & I definitely are (she’s already researching how to source the smoked cod’s roe)

Squid Ink Flatbread F.K.A.B.A.M
Squid ink flat bread with smoked cods roe & egg yolk

The last of our savoury dishes was the crispy pork, fuji apple, bitter leaves & the XO sauce. While we weren’t huge fans of the salad (found it a little too bitter, as the name suggested) the pork was cooked to perfection. Crispy skin, but melt in the mouth tender in the middle.

Crispy Pork F.K.A.B.A.M
Crispy Pork with bitter leaves (photo credit @rosontour)

Last up was the dessert – chocolate mousse & amarena cherry. Now I’m not a huge chocolate dessert fan (I usually find it too rich) but this changed me. Although it used dark chocolate, the mousse was still so light. We both couldn’t stop raving about the crunchy almondy topping. The cherry flavour in this comes in the form of a jelly at the bottom – it was very strong, almost lollipop flavoured. As the mousse & cherry we’re separate layers, we managed to work out the perfect ratio of chocolate mousse, crunch & cherry per spoonful. Another triumph.

Chocolate Mousse F.K.A.B.A.M
Chocolate mousse with amarena cherries

Meg & Ros Ratings

This is the first (but definitely not the last) time Ros has made a feature on bakes by meg. She is one of my closest friends who is equally as obsessed with food as me – if you need any extra proof take a look at her instagram @rosontour. As 2 highly qualified food people, we want to share our verdicts of the best dishes of the evening. Every dish was so delicious we really struggled with this ranking – so remember even the bottom ranking was still incredible.

Meg

  1. Flame grilled short rib (someone get me a bucket of the sauce)
  2. Squid ink flatbread
  3. Crispy potatoes
  4. Crispy pork
  5. Chocolate mousse
  6. Lamb offal flat bread

Ros

  1. Squid ink flatbread
  2. Flame grilled short rib
  3. Crispy potatoes
  4. Crispy pork
  5. Lamb offal flatbread
  6. Chocolate mousse

So, are you more of a Meg or Ros? Let me know in the comments!

We had such an amazing evening at F.K.A.B.A.M – the food, the drink, the environment all made for a really fun experience. And the tasting menu made us try things we maybe wouldn’t usually order. We give F.K.A.B.A.M a huge stamp of approval. Let me know if the comments what you think if you’ve already been, or if you go based on this recommendation! Would love to hear what you think.

Find them at 156 Canonbury Road, London, N1 2UP

Marinara

Basics By Meg: Marinara

I’m starting a basics recipe collection! In this collection I’ll be writing recipes for components that can be built up/used in full dishes. The first in this collection is my marinara sauce. A very tasty, but very simple tomato sauce that can be used in pizzas, pasta, sandwiches etc. etc. – anywhere your heart desires! This tomato sauce is rich in tomato-y flavour making it the perfect sauce to complement other flavours without overpowering them. It has a sweet, tanginess from the tomatoes, followed by a nice round, richness from the butter – the perfect balance (not to toot my own horn…).


Marinara

Makes 700g | 10 mins prep + 30-50 mins cooking

Ingredients

1tbsp oil

1tbsp butter

1 white onion, diced

3 cloves garlic, minced

3 tbsp tomato puree

800g tinned whole tomatoes + their juice

1-2 tsp dried oregano

Method

  1. Heat the oil & butter in a large saucepan over a medium heat. Add the onions & a pinch of salt. Cook until translucent and starting to caramelise (~10mins)
  2. Add the garlic and cook for a minute or 2 until fragrant.
  3. Add the tomato paste and cook until the colour has deepened slightly – around 3-5 mins – stirring often.
  4. Next add the tinned tomatoes and about half a tin full of water. Crush the tomatoes with the back of your spoon.
  5. Simmer this with the lid on for around 30-40 mins until the flavours have intesified.
  6. If using the sauce for pizza or a sandwich (i.e. you want it a little thicker) simmer with the lid off for 5-10 mins to reach the desired consistency.
  7. Add the dried oregano & season with salt and pepper to taste.
Porchetta Sandwich

Porchetta Style Pork Belly Sandwiches

I absolutely love porchetta, but for 2 reasons it’s not really practical for me to make on the reg:

  1. I’m usually only feeding 2-4 people
  2. I can’t easily get my hands on a 5kg slab of pork belly…

So, I came up with this recipe which uses the flavours of porchetta, but on a much smaller scale. Smaller in size, but just as big in flavour. This is a hearty, Italian comfort meal loved by everyone I’ve ever made it for, perfect for picnics or winter meals in. The pork & stuffing are very rich, but the fresh & salty salsa verde really cuts through that. It would also be delicious with some pickled onions added to cut through the richness even more.

I love this in a sandwich with the stuffing, salsa verde & the rest – but the pork belly would work just as well on it’s own as the centre piece of a roast. You can take the components of this dish & make it your own!


Porchetta Style Pork Belly Sandwiches With Salsa Verde and Sausage & Apricot Stuffing

Ingredients

Pork Belly:

600g piece of pork belly, skin on

Large handful parsley

Large hanndful sage

Large handful rosemary

4 large cloves garlic

1/2tbsp fennel seeds

1 white onion

75ml olive oil + extra to coat onions

Sea salt

Sausage & Apricot Stuffing:

1tbsp butter

1/2tbsp olive oil

1/2 white onion, diced

25g pine nuts

8 sage leaves, finely chopped

Small handful parsley, finely chopped

60g dried apricots, diced

75g bread crumbs

200g sausage meat

Salsa Verde:

Large handful of parsley

Large handful of basil

Small handful of mint

1 large garlic cloves

4 anchovy fillets

1tbsp capers

40ml extra virgin olive oil

Sandwich Assembly:

Nice bread – ciabatta or foccacia work well

A few tbsp good quality mayo

Pork Belly:

  1. Preheat the oven to 250°C/230°C fan (or as hot as it will go)
  2. Toast the fennel seeds in a dry pan until fragrant. Grind them in a pestle & mortar.
  3. Put the herbs, garlic, fennel seeds & olive oil into a food processer & pulse until the garlic & herbs are broken down. You want this to be a little chunky still, not a paste.
  4. Slice your onion into coins & place these in the bottom of the roasting tin, this will form the bed for the pork. Lightly coat these in olive oil.
  5. Score the pork belly skin in diagonal strips. Score the underside of the belly into diamonds (i.e. diagonal cuts in both directions)
  6. Rub the fleshy side of the pork generously with sea salt, followed by the herb mix. Place the pork herb side down onto the onions.
  7. Pat the skin dry with kitchen roll, then salt the skin generously. It’s important to do this just before you put it in the oven, if left out the salt will draw the water of the skin and will need to be dried again.
  8. Put the pork in the over for 10-20 mins or until the skin crisps up. Reduce the heat to 160°C/140°C fan & cook for a further 1-1.5 hours.
  9. If at the end of the cooking time the skin needs crisping up a little, cook under a hot grill until crisp. Keep a VERY close eye on this, it can burn very quickly.

Sausage & Apricot Stuffing:

  1. Heat the butter & oil in a pan over medium heat. Add the onion & cook until softened (about 5-10 mins) – try not to let these catch.
  2. Toast the pine nuts in the oven with the pork for about 5-10 mins until golden. Keep a very close eye on these as they can burn very quickly!
  3. Combine all remaining ingredients in a bowl, with the fried onions & toasted pine nuts. Season with salt & pepper (you can taste for seasoning by frying up a small amount)
  4. Push the stuffing mix into a baking dish (22x16cm)
  5. Bake in the oven for 45mins-1hour until golden on top & cooked through.

Salsa Verde:

  1. Chop all ingredients bar the oil on a board until finely chopped.
  2. Transfer this to a bowl & mix with the oil.

Assembly:

  1. I like to warm the bread in the oven for 5-10 mins before assembly.
  2. Remove the crackling from the pork belly & set aside. Slice the pork belly.
  3. I like to make my sandwiches on a piece of foil so when they’re done I can wrap them up tightly. This makes for easier eating
  4. Cut the bread open. Spread mayo on the bottom layer, add the pork belly on top followed by the roasting tin onions. Add stuffing followed by a heapinng dollop of the salsa verde. Top with the other half of the bread & enjoy!
Garlicky anchovy pasta

Speedy Garlicky Anchovy Pasta

Even when I don’t have much time to cook, I refuse to sacrifice deliciousness. I created this pasta for such situations. I used strong flavours to make it exciting despite its simplicity (think salty, anchovy-y, tomatoey goodness). It uses mostly store cupboard ingredients too so not only is it quick to cook, you might not even need to go to the shop. As the cooking of the pasta is finished off in the sauce, the sauce ends up feeling very luxurious and clings to the pasta. This truly is a speedy dinner as the sauce is cooked in the time it takes the pasta to cook.


Speedy Garlicky Anchovy Pasta

Serves 2

15 mins prep + cooking

Ingredients

150g linguine or spaghetti (or any pasta really, but it works well with a long pasta)

1.5 tbsp olive oil

6 anchovy fillets in oil, roughly chopped

4 garlic cloves thinly sliced (or 2 large cloves)

Juice 1/2 lemon

2 tbsp tomato puree

1 tbsp butter (or more to taste)

4 tbsp grated parmesan (or more to taste, plus extra for serving)

Handful of parsley chopped

Panko breadcrumbs to serve (if you can get your hands on lemon & black pepper breadcrumbs, get those!) see the note for how to make the breadcrumbs a little fancier

Method

  1. Add your pasta to salted boiling water and cook for a few minutes less than the packet says.
  2. Meanwhile, add your oil and anchovies to a frying pan on medium high heat and cook until the achovies dissolve.
  3. Add the sliced garlic and cook until lightly golden
  4. Add the lemon juice to the pan and cook until mostly evaporated.
  5. Add the tomato puree and cook for a few minutes, stirring regularly until the colour darkens slightly. Take off the heat until the pasta is ready.
  6. Once the pasta is cooked, put the frying pan back onto medium high heat and transfer the pasta over being sure to reserve the pasta water. Add 100-200ml of pasta water to the frying pan and bring to a boil, stirring often, until reduced to almost nothing. Repeat this process until the pasta is cooked to your liking.
  7. Take the pan off the heat and add the butter & Parmesan. Stir through and add more butter/Parmesan to your taste. Add the chopped parsley.
  8. Serve with more parm and the breadcrumbs sprinkled over

Note: If you have time, I definitely recommend sprucing up your bread crumbs a little. In a frying pan heat up 1 tbsp oil + 1/2 tbsp butter with 2 minced cloves of garlic. Fry until golden, then add breadcrumbs (NOT panko) and fry those until evenly golden.

Gingerbread House: Top Tips

This year I challenged myself to make my best gingerbread house yet, and I think I succeeded (feedback from my family, not just me patting myself on the back). This took me about 4.5 days of baking, decorating & building – and I have 0 regrets about how I used that time. In fact, I think this is probably my favourite way to spend the days up to Christmas. It’s no surprise I love being in the kitchen, so getting to spend 4 days solid working on something while watching ‘Are You Scared?’ on YouTube (my idea of festive viewing) is kind of my dream. Plus it makes for the best Christmas decoration.

My Process

My process for making a gingerbread house starts with trawling Pinterest for inspiration – this was my board for this year. I landed on doing a Victorian style house with bay windows, a balcony and double roof. I used this house to model mine on. The next stage is I give the pictures to my engineer dad & he magically turns it into working templates. I have very little knowledge about how this part works…

Next I move onto the baking. This year I made a double batch of this BBC Good Food gingerbread recipe – the raw dough is so good I’m surprised any of it got baked up. I roll the dough about 0.5cm thick (some key pieces a little thicker for stability) & use a sharp knife to cut out around the templates.

After baking the dough expands a little so, once cooled completely, I flatten off and trim the edges using a microplane grater, checking against the templates. This makes sure the pieces will fit together flush when it comes to building. The baking & trimming took me a full day.

The next step is to decorate. For this I used 1 batch of royal icing from the same BBC Good Food recipe. I used gelatine leaves as window panes by attaching them behind the window with royal icing. Once these had dried enough, I flipped the pieces at did aaaall the royal icing decoration – this took me about 4/5 hours. I left these to dry for a few hours. I keep my royal icing fresh by clipping the top of the bag and covering the tip with cling film.

To build, I used royal icing on a chopping board. I first but up the walls, then left it to set overnight before attaching the roof. Then added all the external decoration pieces & candy canes. PSA: Candy canes are very hard to saw without shattering… I used chocolate buttons to tile the roof – this can only be done once the roof gingerbread pieces are fully set. I added a few icicle details & then filled in the board with royal icing (I had to make a second, slightly thinner batch to do this).

And there you have it – a mere 4.5 days of work later – a Gingerbread House! The funny thing is, I don’t really like gingerbread… So now it’s up to my family to eat it all.

The finished house – fairy lights and all

Top Tips

So, having spent days on this thing I thought I’d share some of the things I’ve learnt along the way to help you make a successful custom gingerbread house:

  1. Spend time on the templates. It’s worth spending a little extra time on these to make sure it works, as this is hard to fix when it comes to assembly. You could even make a card mock-up to check everything fits.
  2. It’s better to cook your gingerbread a teeny bit longer than normal to make sure it’ll cool hard all the way through. I added 1-2 mins to the cooking time.
  3. Always shave the sides of your gingerbread. Gingerbread expands slightly meaning it’ll be bigger than the templates and make not fit together properly. I used a microplane grater to do this.
  4. Always make a few extra gingerbread fingers. These came in really handy this year when I realised one of my walls was too short. I propped it up on my extra gingerbread – which really saved the house.
  5. Decorate your pieces before attaching – this is much easier horizontal than it is vertical.
  6. When putting together the walls, pipe a little extra icing along the inside of the join for extra stability.
  7. I had to use dowels on the back of the pieces making up the tallest point, as these started to bend slightly as they got stale. So if you have any extra tall/thin pieces be sure to stabilise then using dowels & royal icing to attach.
  8. ‘Snow’ covers a multitude of sins – if something’s gone slightly wrong or a seam looks a little dodgy, cover it in royal icing and act like that was always meant to be there.